

THIS POST MAY CONTAIN AFFILIATE LINKS. PLEASE READ MY DISCLOSURE FOR MORE INFO.
Knowing how to clean a coffee machine starts with separating the everyday jobs from the occasional ones. Used grounds, coffee oils, milk residue, and mineral scale need different kinds of attention. A quick rinse might deal with loose grounds, but it does not complete every part of the machine’s care routine.
The manageable approach is to clean the parts you use each day, follow the care instructions for your type of brewer, and schedule descaling when your manufacturer recommends it. You can do the small jobs alongside washing your breakfast dishes. The longer cycle can have its own place on the calendar.
This guide covers drip coffee makers, pod machines, and home espresso machines. Choose the section that matches yours rather than working through every method. Instructions for your exact model and the label on its approved cleaning product take priority, especially for internal cycles, milk systems, and water filters.
Disclosure: This post may contain affiliate links. As an Amazon Associate, Clean Home Challenge earns from qualifying purchases. If you make a purchase through these links, we may earn a small commission at no extra cost to you. This helps us keep creating practical cleaning tips, routines and resources for busy families! 🧽
Start With Your Machine’s Manual
Before buying supplies or pouring anything into the reservoir, find the model number and open the manufacturer’s care guide. Two machines from the same brand can use different descaling programs, cleaning accessories, and dishwasher-safe parts.
Look for four things: the removable-parts diagram, the routine cleaning instructions, the descaling procedure, and the water-filter schedule. Save that page on your phone or keep the booklet near your coffee supplies. You will not need to work out the button sequence from memory every time a light starts flashing.
Know which job you are doing
- Cleaning removes coffee residue, oils, spills, and other material from the relevant parts.
- Descaling treats mineral deposits left by water inside the machine.
- Milk-system cleaning deals with the components that contact milk or plant-based drinks, using the method specified for that system.
A product intended for one job may be unsuitable for another. For example, an espresso cleaning tablet used with a cleaning disc is not automatically a descaler for the water tank. Moccamaster’s manufacturer guidance explains the different purposes of cleaner and descaler.
Gather a small, sensible kit
Start with a soft, nonabrasive cloth, a gentle dish brush for suitable removable parts, a clean drying rack, and fresh water. Add mild dish soap only for parts whose care instructions allow it. Keep the correct machine cleaner or descaler for its separate scheduled job; you do not need either to wipe a coffee splash off the counter.
For hands-on washing, switch the machine off, unplug it, and let hot parts cool. Keep the electrical body, cord, plug, and contacts out of water. OXO’s 8-Cup instruction manual specifically requires unplugging before cleaning and protecting the cord and plug from liquid.
Powered rinsing, steaming, and descaling are separate procedures: reconnect and operate the appliance only as its instructions direct. Keep hands clear of hot outlets and place the collection container securely. Do not start a long cycle just before leaving the house.

Clean the Parts You Can Remove
Begin with the pieces you can safely take to the sink. Depending on the machine, that may include a carafe, basket, drip tray, capsule container, reservoir, or removable lid. A part that lifts out is not necessarily dishwasher-safe or suitable for soaking.
Make a simple three-way decision for each component: dishwasher permitted, hand-wash permitted, or wipe/rinse only. For example, OXO allows several parts of its 12-Cup brewer on the top rack but specifies hand washing for its carafe and lid. Follow the model’s own cleaning instructions, rather than applying one rule to the entire appliance.
Work from emptying to drying
- Discard the leftovers. Remove the used paper filter, grounds, or capsule according to the machine’s instructions. Empty cooled leftover coffee and the drip tray.
- Separate only the approved pieces. Put small seals or detachable fittings somewhere they will not disappear down the drain. If a part resists, check the diagram rather than forcing it.
- Wash or rinse as directed. Use gentle pressure around seams and openings. Pay attention to the underside of lids, carafe spouts, basket rims, and tray grilles where you can see residue.
- Rinse thoroughly. Do not leave soap in a part that will contact drinking water or coffee. Avoid abrasive pads that could scratch a finish or coating.
- Dry and reassemble. Give hollow pieces time to drain. Check that lids, trays, and tanks sit properly before using the machine again.
The reservoir deserves its own check. Follow its specified method instead of assuming it needs dish soap. Keurig’s K-Supreme Over Ice care guide, for example, describes wiping the reservoir interior and lid underside with a damp, nonabrasive, lint-free cloth, then allowing it to dry rather than drying the inside with a cloth.
If residue remains after the permitted wash, consult the part’s care instructions for the next treatment. Resist combining several cleaning products or scraping away a stubborn mark with a knife. The goal is a properly cleaned, intact part, not a risky shortcut to a spotless photograph.

Refresh a Drip Coffee Maker
A drip brewer has two useful care areas: the parts that collect brewed coffee and the water path inside the machine. Start with the first area after your final pot has cooled enough to handle safely.
Give the coffee-contact parts attention
Remove the used filter and grounds, then clean the carafe, lid, and brew basket by their approved methods. With a soft brush, reach the spout and the edges of a reusable filter without bending or damaging its mesh. Do not tap a fragile basket against the sink to dislodge stuck grounds.
Inspect the accessible showerhead or outlet arm. Remove it only if the manual identifies it as user-removable. Wipe the cooled warming plate and outer body with the permitted damp cloth; avoid getting water into controls or openings. Reassemble everything in its proper position before a powered cycle.
Moccamaster’s brewer-cleaning guide covers washing its removable parts with dish soap and water. It also makes a useful everyday point: refilling the reservoir with a used coffee carafe can carry coffee oils back into the water tank. A separate clean water pitcher is an easy way to keep that step simpler.
Deal with stains without guessing
If the carafe still has a brown film, check its specific instructions for a compatible coffee-oil cleaner and soaking method. A treatment approved for a stainless steel thermal carafe may not suit a coated component or another carafe’s lid. Keep a carafe-only soaking treatment out of the reservoir unless the manufacturer explicitly approves running it through the brewer.
An internal cleaning or descaling cycle should follow the named product, dose, program, and rinse sequence in the guide. Ordinary dish soap belongs only on approved washable components, not in the water path. Repeated water-only brews are not a substitute for a descaling cycle when scale removal is due.
Make the next pot easier
Leave washed components to dry as instructed, and check that the basket is seated before brewing again. Keep the water pitcher and filters together so the next person can set up without searching through a crowded cabinet.
If coffee still tastes unpleasant after correct cleaning, check the coffee’s freshness and your brewing proportions too. Cleaning cannot compensate for every brewing problem. Note whether the issue affects taste, temperature, or water flow; that description will help if you need manufacturer support.

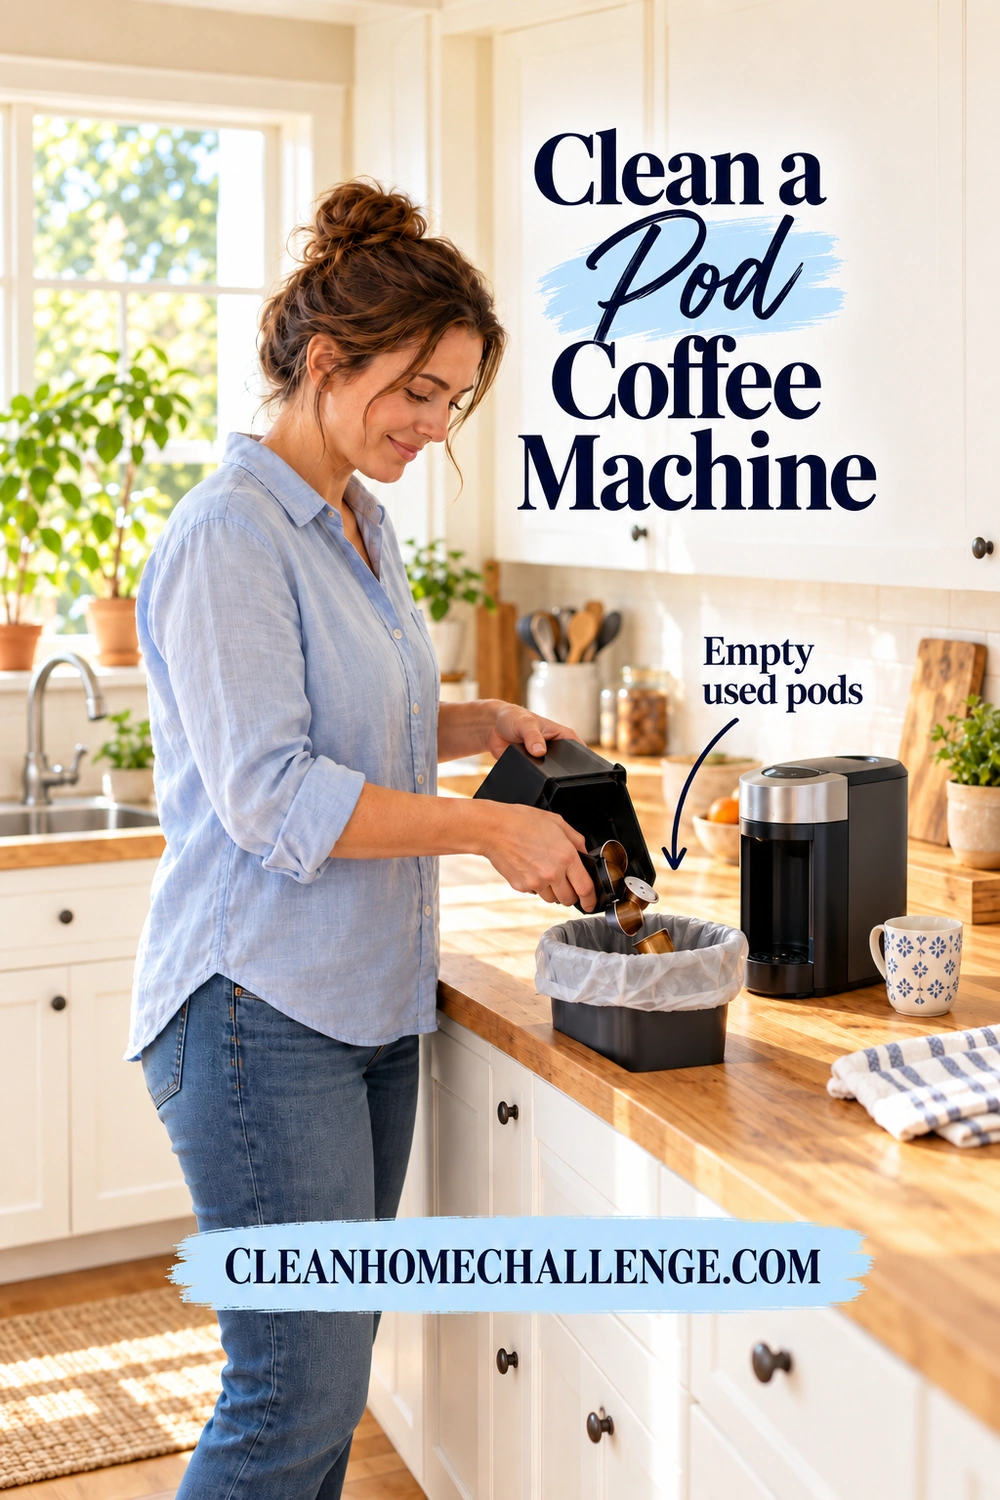
Clean a Pod Coffee Machine
Pod machines hide most of the brewing process, which can make their maintenance easy to overlook. The removable tray, used-capsule container, pod area, and reservoir still need attention.
Start by letting the machine finish its cycle. Remove or eject the capsule in the way your model specifies, then switch off, unplug, and allow hot parts to cool for hands-on cleaning. Wash the approved loose parts, empty collected liquid, and clean the accessible coffee outlet without reaching into the internal mechanism.
Treat the pod area carefully
Some machines use sharp piercing needles. Keep your fingers away from them. On models with a removable pod holder or a manufacturer-supplied cleaning tool, follow the exact removal and clearing procedure. Do not improvise with a pin, brush, or paper clip simply because a method worked on a different brewer. Keurig’s K-Supreme Over Ice manual identifies the sharp-needle areas and provides model-specific instructions.
If a capsule seems stuck, stop and look up that model’s troubleshooting steps. Forcing the lever or pulling at a hot capsule can turn a small cleanup into a damaged part or a burn.
Use the correct rinse program
A water-only rinse can be part of routine care, but the controls vary. Read the cleaning instructions for your precise machine, remove any capsule when directed, fill with the specified fresh water, and position a container large enough for the complete discharge. Nespresso provides separate Vertuo machine-assistance guides for cleaning and descaling; do not substitute one sequence for the other.
Let the rinse finish and dispose of the collected liquid carefully. A few drops on the tray afterward are a reminder to empty it, not a reason to start dismantling the brewing head.
Remember the separate milk frother
An electric frother has its own care rules. Nespresso’s Aeroccino 3 manual calls for cleaning after every use, prohibits immersing the jug or base, and does not permit dishwasher cleaning. Other frother models can differ. Check yours, keep electrical contacts dry, and remove only the lid, whisk, or seals identified in its instructions.
Care for an Espresso Machine
Espresso care is easier when you separate the quick after-coffee tasks from the machine’s cleaning and descaling programs. Manual portafilter machines and fully automatic bean-to-cup machines need different handling, so choose the advice that matches your setup.
Portafilter, basket, and brew area
After brewing has ended and pressure has released as the manual directs, remove the portafilter, discard the puck, and rinse the basket and portafilter using the specified method. Clear visible loose grounds from accessible surfaces. Use a dedicated clean cloth for the coffee area rather than the cloth used for other kitchen messes.
If the machine calls for a group-head rinse, carry it out as directed while keeping hands away from the hot water. Backflushing is only appropriate when the manufacturer explicitly instructs it. Do not add a blind basket, cleaning disc, or tablet to a machine that has not been designed for that procedure.
The Breville Barista Express manual describes a cleaning-disc-and-tablet cycle separately from descaling. Its button sequence, accessories, and indications belong to that model; an unfamiliar cleaning light is a reason to check your guide before choosing a product.
Make milk care an immediate habit
Follow your steam wand’s after-use wipe-and-purge procedure. Breville’s Barista Express steam-wand tutorial specifies wiping with a damp cloth and directing the wand over the drip tray for a brief purge. Keep hands out of the steam path and use the insulated grip where provided. For a blocked tip, switch off and allow it to cool before using the approved tool or removing an approved detachable tip.
An automatic milk system may need both an after-drink rinse and periodic disassembly. De’Longhi’s Magnifica Evo milk-carafe guidance distinguishes these jobs. Complete the prescribed rinse, then follow the carafe’s separate washing instructions; the rinse button does not eliminate that second task. Follow the same system-care instructions when using a compatible plant-based drink.
Fully automatic machines need their own route
Only remove a brew unit if the manufacturer permits it, and complete the required shutdown first. De’Longhi specifies water-only cleaning for its removable brewing unit. Putting every removable component into soapy water would be the wrong approach here.
Keep water and wet cloths out of the bean hopper and grinder. Use the prescribed dry-cleaning method, and leave internal repairs to service support.

Descale Without Damaging Your Machine
Descaling is the scheduled treatment for mineral buildup. It does not replace washing a sticky drip tray, removing used grounds, or cleaning a milk system. Put it on your calendar as a separate job with enough time to finish every required rinse.
Follow a model-specific sequence
- Check the trigger. Use the manufacturer’s interval, usage count, water-hardness setting, or alert. Do not wait for the machine to struggle if routine descaling is already due.
- Read the complete procedure. Check the total duration, required container size, product amount, and rinse stages before beginning.
- Prepare as directed. Remove coffee or capsules, empty the appropriate containers, and remove the water filter if the instructions require it. Do not assume the filter should remain in the tank.
- Use the approved treatment. Follow both the machine instructions and the product label. More concentrated solution or extra soaking time is not automatically better.
- Finish the full program. Keep clear of hot discharge, refill when instructed, and complete all fresh-water rinses and exit steps before brewing a drink.
These are planning steps, not a universal operating sequence. Moccamaster’s descaling walkthrough, for example, is written for its own brewers and compatible products. Follow the equivalent guide for yours.
Can you use vinegar?
Only if the manufacturer specifically approves it for your exact model, with a stated method. There is no vinegar ratio that belongs in every coffee machine. Nespresso advises against vinegar and other home-remedy descalers, while Moccamaster’s current care guidance also does not recommend vinegar.
Do not combine descaler with dish soap, vinegar, baking soda, bleach, or another product. Never use household disinfectants in the coffee-water path. Keep cleaning supplies in their original labeled containers, away from children and pets, and follow any label requirements for handling and eye protection.
What about filtered water?
A filter does not give every machine a permanent exemption from descaling. OXO notes that its 12-Cup brewer still needs regular descaling when filtered water is used. Use the water type recommended for your machine and replace its filter according to the relevant schedule. Record filter changes separately from descaling so one job does not accidentally stand in for the other.
If the machine leaks, has a damaged cord, smells electrically hot, or cannot complete its approved cycle, stop using it and contact the manufacturer. Persistent faults need troubleshooting, not progressively stronger chemical treatments.

Build a Small Coffee-Care Routine
You do not need to deep-clean the whole coffee station every morning. A short routine works best when each job has a clear trigger and the supplies are easy to reach.
After the day’s coffee
Take care of used grounds or capsules, the relevant coffee-contact parts, and collected tray liquid. Complete milk-system care after use, rather than leaving it for a weekly reset. Once the appliance is safe to handle, wipe visible splashes and leave washed parts to dry as directed.
Treat this as the closing step of making coffee. If several people use the machine, agree on who empties the tray and handles the final cleanup. A small shared habit is more useful than assuming someone else has done it.
On Monday’s kitchen-cleaning day
Take a closer look at lid undersides, the reservoir, removable fittings, and the space beneath the appliance. Check the manual for any weekly tasks and look ahead at filter or descaling reminders. This is a convenient CHC routine cue, not a replacement for the manufacturer’s intervals.
For instance, Moccamaster recommends descaling after 100 brew cycles, with more frequent treatment potentially needed in hard-water conditions. Other machines use different triggers. Write down the schedule for yours rather than borrowing your neighbor’s.
The low-energy version
If you have only five minutes, choose the essential after-use jobs: remove the spent coffee, finish any required milk cleaning, and empty the tray if needed. Wash one set of permitted loose parts while you are already at the sink. Leave organizing the coffee shelf for another day.
That five-minute reset is an estimate for hands-on tidying, not a promise that a machine-cleaning or descaling program takes five minutes. If a required cycle is due, plan a separate window and follow the instructions about continued use. Do not begin it unless you can finish it properly.
Keep a simple note with the last cleaning cycle, last descale, filter-change date, and the next trigger from the manual. A phone reminder or a paper note inside the supply cabinet is enough.
Learning how to clean a coffee machine becomes much less of a project when the routine fits the way your household actually makes coffee. Start with today’s used parts, give milk residue prompt attention, and let the correct care guide handle the occasional bigger jobs.

CLEANERS CLUBHOUSE
Make Kitchen Cleaning Feel More Manageable
Turn Monday into your kitchen reset day with a clear routine you can follow. The Cleaners Clubhouse gives you practical cleaning guidance, printable support and monthly challenges to help you stay consistent.
