

THIS POST MAY CONTAIN AFFILIATE LINKS. PLEASE READ MY DISCLOSURE FOR MORE INFO.
Walls, doors and skirting boards can look tired long before the rest of a room feels dirty. Dust settles along trim, hands leave marks around switches and handles, and shoes or vacuum heads add scuffs at floor level. The good news is that most rooms do not need an aggressive full-wall scrub. A careful dust, spot-clean and light wash is usually enough.
The safest approach is to work from the gentlest method upward. Start dry, identify the paint or finish if you can, test a hidden patch, and use only a slightly damp cloth or nonabrasive sponge with a small amount of mild dish soap. Strong cleaners, rough pads and heavy scrubbing can change the sheen or lift paint—especially on flat or matte finishes.
This guide uses “baseboards” for the trim along the bottom of a wall; in Australia and the UK, the same trim is commonly called skirting boards. The exact title is preserved here, but the cleaning method works whichever term you use.
Plan on about 20 to 30 minutes for a light clean in one average room, or longer if you are washing large wall areas. You can also split the work: dust one day, clean marks the next, and do doors and trim during a later reset. A finished room matters more than trying to do the whole house at once.
Disclosure: This post may contain affiliate links. As an Amazon Associate, Clean Home Challenge earns from qualifying purchases. If you make a purchase through these links, we may earn a small commission at no extra cost to you. This helps us keep creating practical cleaning tips, routines and resources for busy families! 🧽
Check the Paint and Test Before You Clean
Before adding water, look closely at the surface. Is the wall painted, wallpapered, unfinished plaster, timber, laminate or another specialty finish? This article focuses on sound interior paint. Wallpaper, limewash, unsealed surfaces, decorative finishes and unknown coatings need their own manufacturer-approved care method.
Check for peeling, bubbling, chalking, cracks or water stains. Washing will not fix moisture damage, failing paint or mold growth. Stop and address the source of a leak or persistent dampness before cleaning. If paint is loose, do not scrub it back into place; arrange the correct repair.
Fresh paint also needs time to cure. Benjamin Moore explains that paint may feel dry quickly but can take about 30 days to cure fully, and recommends waiting until it is cured before routine cleaning. Follow the instructions for the exact paint product because cure times vary.
Test your method behind a door, low beside furniture or in another inconspicuous area. Use the same cloth, moisture level and pressure you intend to use on the visible surface. Let the patch dry completely, then check it in daylight for color transfer, shiny spots, dull patches or softened paint.
Older homes need one extra safety check. In the United States, EPA guidance says homes built before 1978 are more likely to contain lead-based paint, especially where paint is peeling or friction surfaces such as doors are worn. Do not sand or aggressively scrub suspect deteriorating paint. Use lead-safe guidance or a qualified professional when the coating may contain lead.

Gather a Gentle Wall-Cleaning Kit
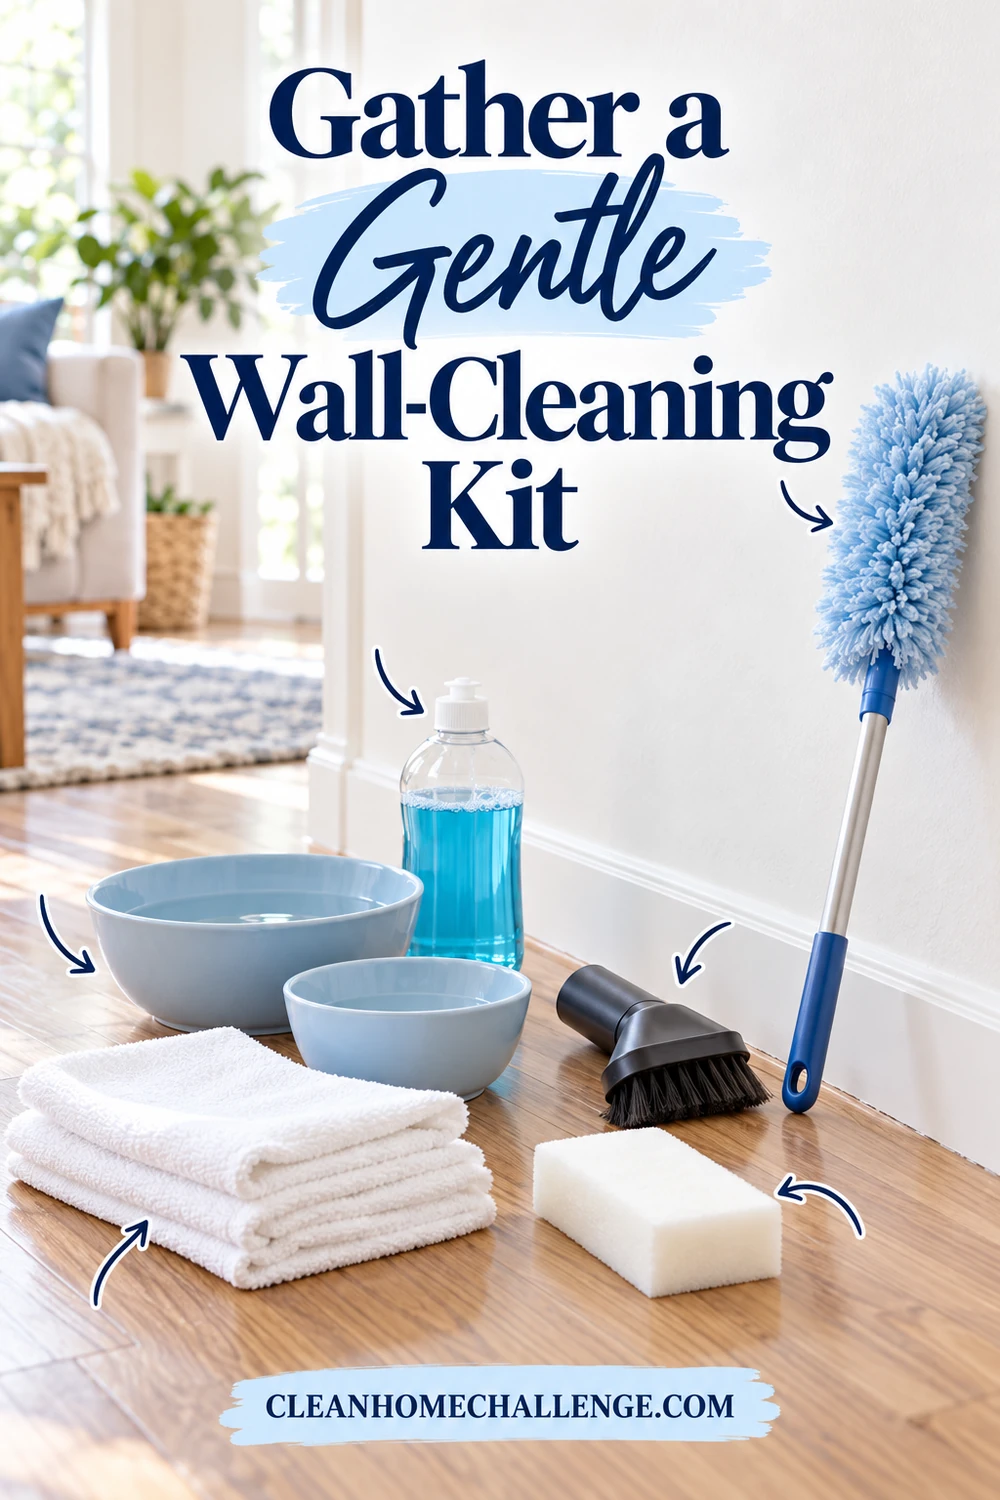
Keeping the kit simple helps prevent accidental damage. Gather:
- a vacuum with a clean soft-brush attachment;
- a clean microfiber duster or flat microfiber wall mop;
- two or three white microfiber cloths;
- a white, nonabrasive sponge;
- two buckets or bowls—one for wash water and one for clean rinse water;
- slightly warm water;
- a small amount of mild dish soap;
- dry towels for drips and floor protection;
- a stable step stool for reachable high areas; and
- optional knee protection for baseboards.
White cloths make paint transfer easier to see. Avoid soaking a wall mop, spraying cleaner directly over a large area or working from an unstable chair. If you cannot safely reach a high section, use a lightweight extension tool or leave that area for someone with suitable access equipment.
Do not begin with bleach, ammonia, alcohol, solvent cleaner, scouring powder, rough scrubbers or a melamine sponge. Paint manufacturers may specifically warn against abrasive pads and harsh chemicals. Even a popular “eraser” sponge works by abrasion and can leave a polished or faded patch.
Dust the Room From Top to Bottom
Dry soil should come off before wet cleaning. Otherwise, dust mixes with water and becomes gray streaks that are harder to remove.
Move light furniture away from the wall and place a towel along the floor. Start at the ceiling line with a clean microfiber duster or vacuum brush. Work across vents, the tops of door frames, picture rails and the upper corners where cobwebs collect. Continue down the wall in overlapping passes.
Pay extra attention to texture and edges. Dust gathers around frames, behind open doors, along hinges and on the narrow ledge at the top of a baseboard. Use the vacuum brush for dry debris, but keep hard plastic nozzles away from paint so they do not scratch or leave black marks.
In bedrooms and living rooms, a thorough dry pass may be all the wall needs. In kitchens, entryways and children’s rooms, continue with spot cleaning where hands, cooking residue and everyday traffic leave visible marks.
Clean one room fully before moving on. This keeps the duster, cloths and rinse water under control and gives each test patch time to dry. If the dust load is heavy, change or wash the microfiber head rather than spreading dust into the next room.

Wash Painted Walls Without Leaving Streaks
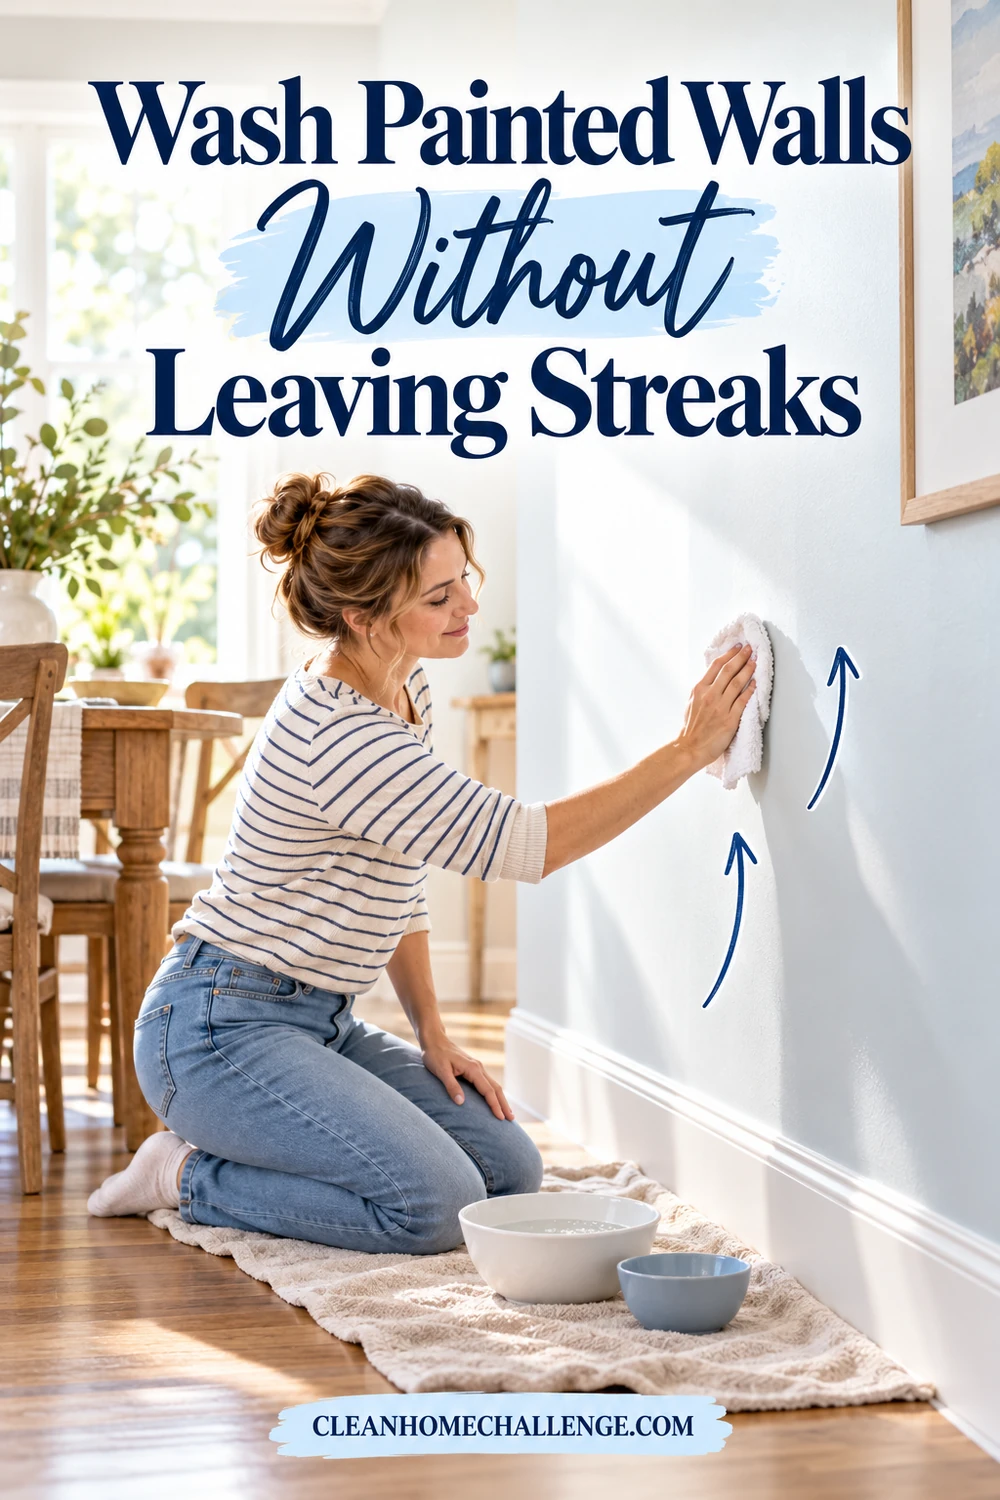
Fill one container with slightly warm water and a few drops of mild dish soap. Fill the second with clean water. The wash solution should feel barely soapy, not foamy. Too much detergent leaves residue that attracts dust and can make a wall look patchy.
Dip a soft white cloth or nonabrasive sponge into the wash water, then wring it out thoroughly. It should be damp, not dripping. Benjamin Moore recommends starting at the bottom and working upward so runs do not travel down a dry wall and set as streaks.
Work in a small section roughly two to three feet wide:
- Wipe gently from the bottom of the section upward with light, even pressure.
- Concentrate on visible marks instead of repeatedly rubbing the entire area.
- Rinse the section with a second cloth dampened in clean water.
- Blot drips or excess moisture with a soft dry towel.
- Step back and check the surface from the side before continuing.
Do not saturate seams, wall outlets or switch plates. Turn off power at the appropriate circuit before removing covers or cleaning close to electrical components, and never allow liquid to run behind a fitting. For ordinary dust and fingerprints, clean the cover carefully rather than spraying the wall.
Flat and matte finishes can show burnishing more readily, while higher-sheen paints are often more washable. However, the product and its condition matter more than the general finish name. Use minimal pressure and stop immediately if color transfers to the cloth or the sheen changes.
If a whole wall is not visibly dirty, wash only the high-contact zones: beside switches, behind dining chairs, around a hallway corner and near a child’s bed. Spot cleaning saves time and reduces unnecessary wear.
Clean Doors, Handles and Door Frames
Doors collect dust on horizontal ledges and fingerprints around handles. Begin at the top edge, which is easy to miss, then dust the panels, hinges, frame and jamb. Vacuum loose debris from decorative grooves before using a damp cloth.
For a painted door, use the same tested mild-soap method as the walls. Work in sections and wipe with the grain or panel shape so moisture does not sit in corners. Clean around the handle with a small damp cloth rather than flooding the hardware. Finish with a clean damp rinse cloth and dry the edges.
Door handles are high-touch surfaces, but cleaning and disinfecting are different jobs. Routine soil usually needs cleaning. During illness, use a disinfectant only when the product label permits the surface and follow its stated contact time, ventilation and safety directions. Never combine it with another cleaner.
Inspect the lower edge and the side that meets the frame. Shoe marks and handprints often hide there. If paint is worn where the door rubs, cleaning will not correct the friction. Adjusting the door or repairing the finish may be more useful than scrubbing harder.
On natural timber, stained wood, laminate, metal or glass-panel doors, follow the manufacturer’s care instructions for that material instead of assuming the painted-wall solution is suitable.

Clean Skirting Boards Without Hurting Your Back
Baseboards or skirting boards gather a combination of dust, pet hair and floor-cleaning splashes. Vacuum first with a soft brush, including the top lip and the floor joint. A dry microfiber cloth wrapped around a flat tool can help reach behind furniture without kneeling for every inch.
For washing, work in short sections. Sit on a low stable stool, use a kneeling pad or alternate positions rather than bending from the waist around the whole room. Wipe the trim with a well-wrung cloth and mild soapy water, rinse with a second damp cloth, then dry the top edge so moisture does not sit against the wall.
Keep water away from gaps, unfinished MDF edges and damaged caulk. If trim is chipped or swollen, clean gently and plan a repair rather than soaking it. When the floor is timber or laminate, place a dry towel beneath the section and wipe drips immediately.
Finish the room by vacuuming or cleaning the floor. Dust and crumbs knocked down from walls and trim should be removed last. This top-to-bottom order prevents you from cleaning the same area twice.

Remove Scuffs and Marks Without Damaging Paint
Use a simple escalation ladder for marks:
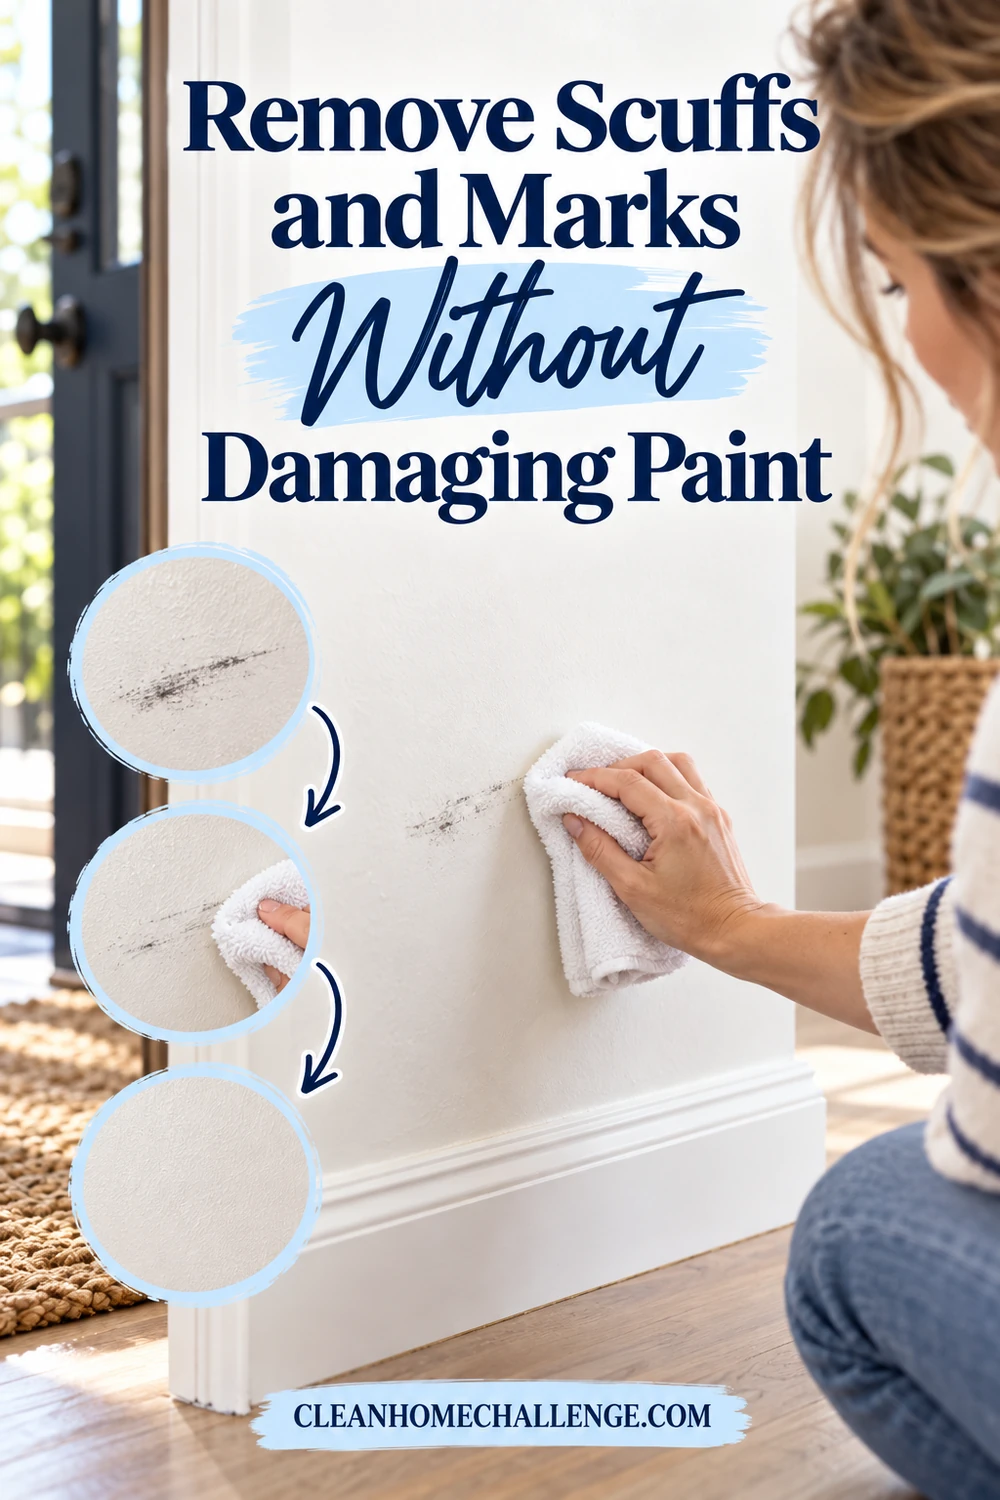
- Try a clean dry microfiber cloth.
- Move to a cloth dampened with plain water.
- Use the tested mild-soap solution.
- Stop if the mark remains and check the paint manufacturer’s guidance before trying a specialty product.
Avoid the urge to scrub faster. Black scuffs may lift gradually with several gentle passes, while pencil, marker, crayon, grease and adhesive each behave differently. A treatment that removes a mark can also remove the wall finish.
For kitchen grease, refresh the mild solution and clean a small area at a time. Do not add an unverified solvent or mix household chemicals. Around children’s art marks, identify the material first and test the proposed remover out of sight.
If a stain has penetrated flat paint, the least damaging answer may be a careful touch-up. Use the original paint, sheen and application method when possible. Paint stored under a different label or applied with a brush instead of the original roller can flash under side lighting, so make a small test first.
Marks that return may point to another issue: furniture rubbing the wall, a door striking the trim, damp shoes at the entry, cooking vapor, a dirty air vent or moisture inside the wall. Fixing the source prevents endless spot cleaning.
Keep Walls, Doors and Baseboards Cleaner Longer
A little maintenance protects the paint and shortens future room resets. Once a month, dust the rooms that collect the most traffic. During weekly cleaning, notice fingerprints around handles and switches, wipe fresh splashes promptly and vacuum the top of baseboards in rooms with pets.
Use washable mats at entries, felt pads behind furniture that touches walls and a doorstop where a handle strikes paint. Leave a small air gap behind large furniture on an exterior wall so you can inspect and dust the area. Keep a labeled jar of touch-up paint with the room, color, product, sheen and date clearly recorded.
For a manageable whole-home rotation, choose one or two rooms each week:
- Week 1: entry and hallway;
- Week 2: kitchen and dining area;
- Week 3: living room and bedrooms; and
- Week 4: bathrooms, laundry and utility spaces.
On a low-energy day, dust the tops of frames and wipe only the visible handprints. That small reset still counts. The goal is to preserve the finish and make the home feel cared for—not to wash every square inch on a rigid schedule.


CLEANERS CLUBHOUSE
Follow a Simple Room-by-Room Cleaning Plan
Break the house into manageable spaces and know exactly where to focus next. The Cleaners Clubhouse gives you a follow-along 12-month calendar, printable worksheets and motivating monthly challenges.
Trusted Sources
- Benjamin Moore, “How to Clean and Maintain Freshly Painted Walls & Cabinets”: https://www.benjaminmoore.com/en-us/interior-exterior-paints-stains/how-to-advice/interiors/how-to-clean-freshly-painted-walls-and-cabinets
- U.S. Environmental Protection Agency, “Reduce the Risk of Lead Exposure at Home,” updated August 19, 2026: https://www.epa.gov/lead/reduce-risk-lead-exposure-home
- U.S. Environmental Protection Agency, “Lead-Safe Renovations for DIYers”: https://www.epa.gov/lead/lead-safe-renovations-diyers