
THIS POST MAY CONTAIN AFFILIATE LINKS. PLEASE READ MY DISCLOSURE FOR MORE INFO.
Soap scum can make clear shower glass look cloudy, dull and permanently marked. It is usually a mixture of soap residue, body oils and minerals left behind as water dries. The good news is that most buildup can be removed without rough scourers or exhausting scrubbing.
The safest approach is to start gently, give the cleaner time to work, and use a soft cloth or non-scratch pad instead of force. This guide walks you through the whole job, including how to tell soap scum from hard-water scale, what to avoid, and how to keep the glass clearer with a realistic routine.
Important: Check the shower-door manufacturer’s care instructions first, especially if the glass has a protective coating. Test any cleaner in an inconspicuous corner. Ventilate the bathroom, wear gloves when the label recommends them, and never mix cleaning products.
Disclosure: This post may contain affiliate links. As an Amazon Associate, Clean Home Challenge earns from qualifying purchases. If you make a purchase through these links, we may earn a small commission at no extra cost to you. This helps us keep creating practical cleaning tips, routines and resources for busy families! 🧽
First, Check the Glass, Frame and Nearby Surfaces
Before spraying anything, look at the whole shower enclosure. Standard uncoated glass, factory-coated glass, acrylic panels, metal frames, rubber seals and nearby natural stone can all have different care requirements.
Look for a maker’s label near the hinge, frame or bottom corner, then check the manual if you can. A protective glass coating may require a pH-neutral product and may specifically exclude abrasive pads, strong acids, alkalis or certain solvent cleaners.
Also inspect for chips, loose seals and deep scratches. Cleaning can improve surface residue, but it cannot repair etched glass or mineral damage that has altered the surface. If a white mark remains perfectly smooth and unchanged after careful cleaning, it may be etching rather than removable buildup.
Protect a natural-stone shower tray, marble sill or stone tiles from acidic products. Vinegar and some limescale removers can dull or etch acid-sensitive stone. Cover the surface or choose a compatible cleaner for the entire enclosure.

Tell Soap Scum From Hard-Water Scale
Soap scum often looks like a greasy, cloudy film and is most obvious where shampoo, bar soap and body wash splash. It may feel slightly waxy. Hard-water scale is more likely to form pale spots, chalky edges or a rough mineral crust where droplets repeatedly dry.
Many shower doors have both. That matters because a mild detergent is useful for oily residue, while mineral deposits may need a glass-safe acidic cleaner if the manufacturer permits it.
Start with warm water and a small amount of dishwashing liquid or a manufacturer-approved shower-glass cleaner. If the greasy haze lifts but distinct mineral spots remain, treat the remaining marks separately rather than reaching for a harsher all-purpose scrub.
Do not assume every cloudy patch is mold. Cleaning physically removes dirt and residue; disinfecting is a separate process and is not normally needed just to restore cloudy shower glass. If you do use a disinfectant for another reason, clean first and follow its label exactly.

Gather a Non-Scratch Shower-Glass Cleaning Kit
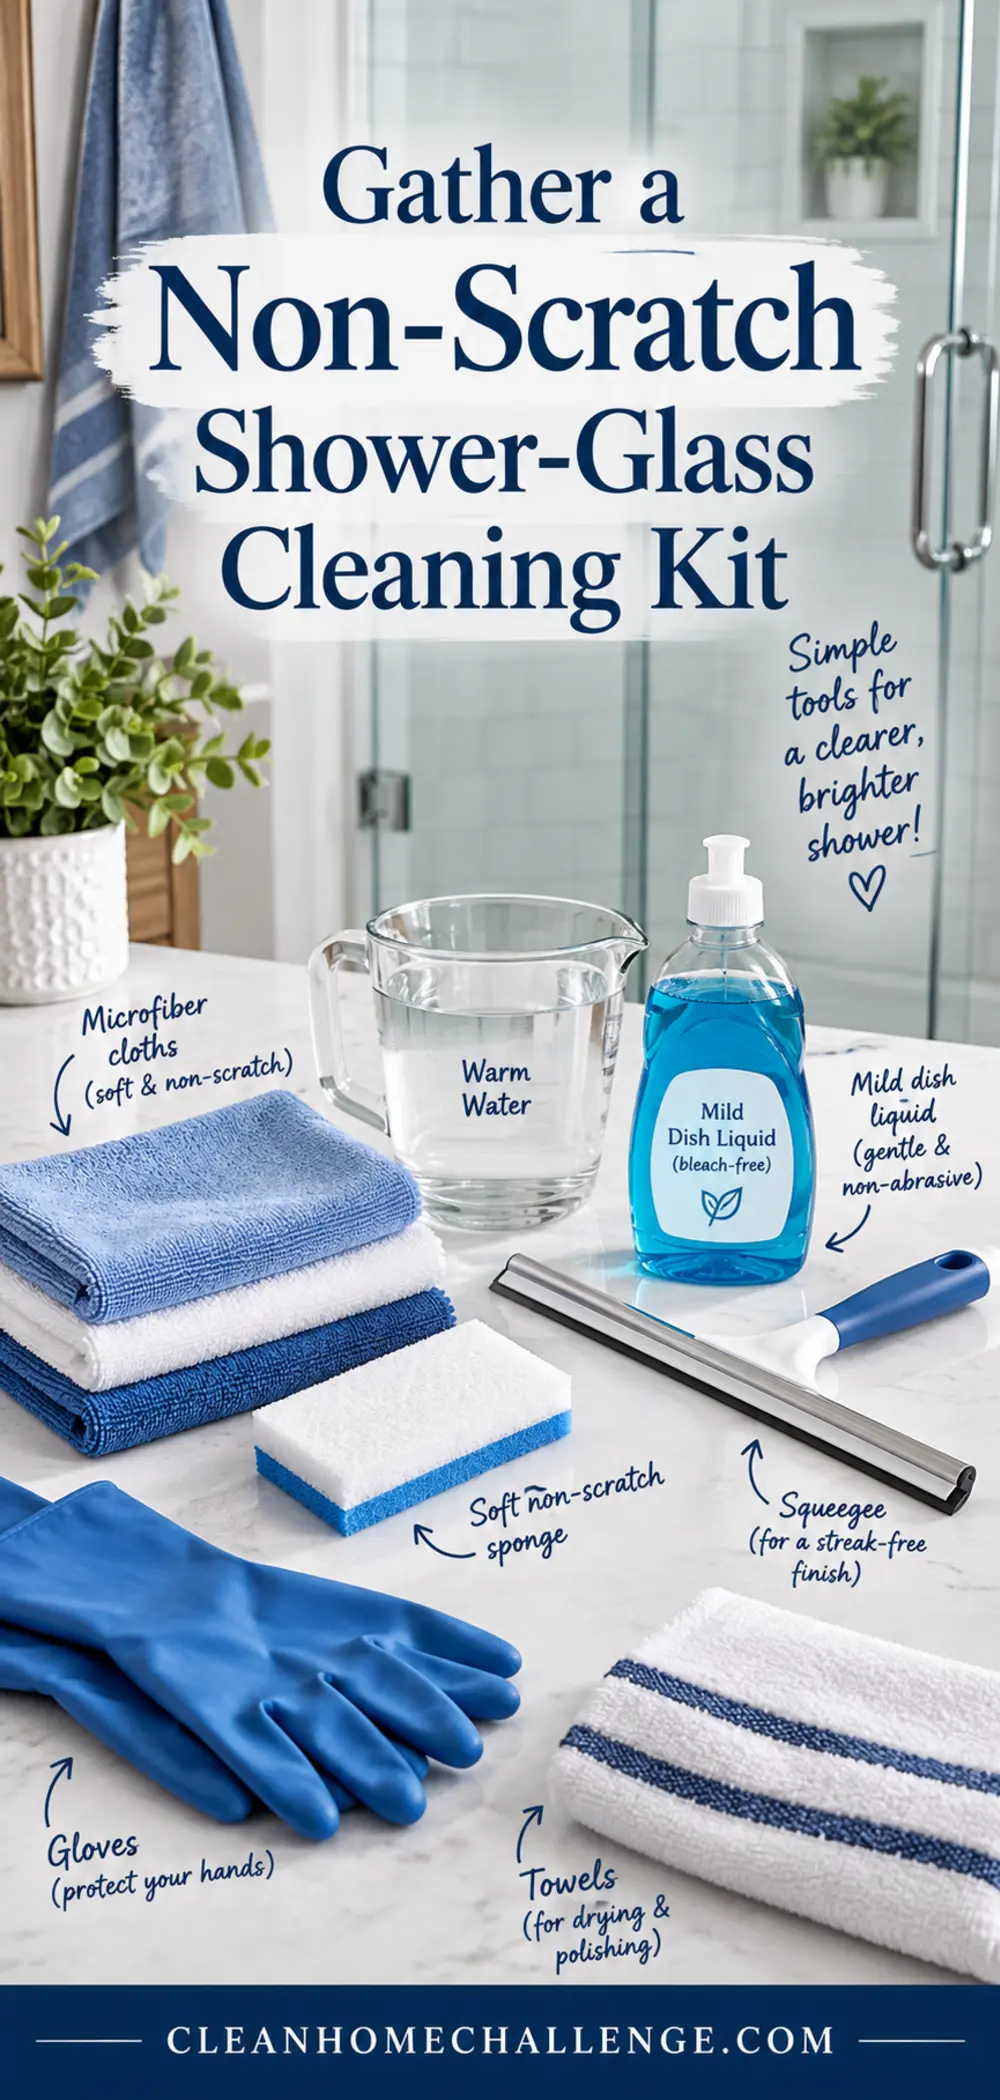
You do not need a complicated collection of products. Gather:
- two or three clean microfiber cloths;
- a soft, non-scratch sponge or pad specifically labeled safe for glass;
- a shower squeegee;
- a small bucket or bowl of warm water;
- dishwashing liquid or a shower-glass cleaner approved for your enclosure;
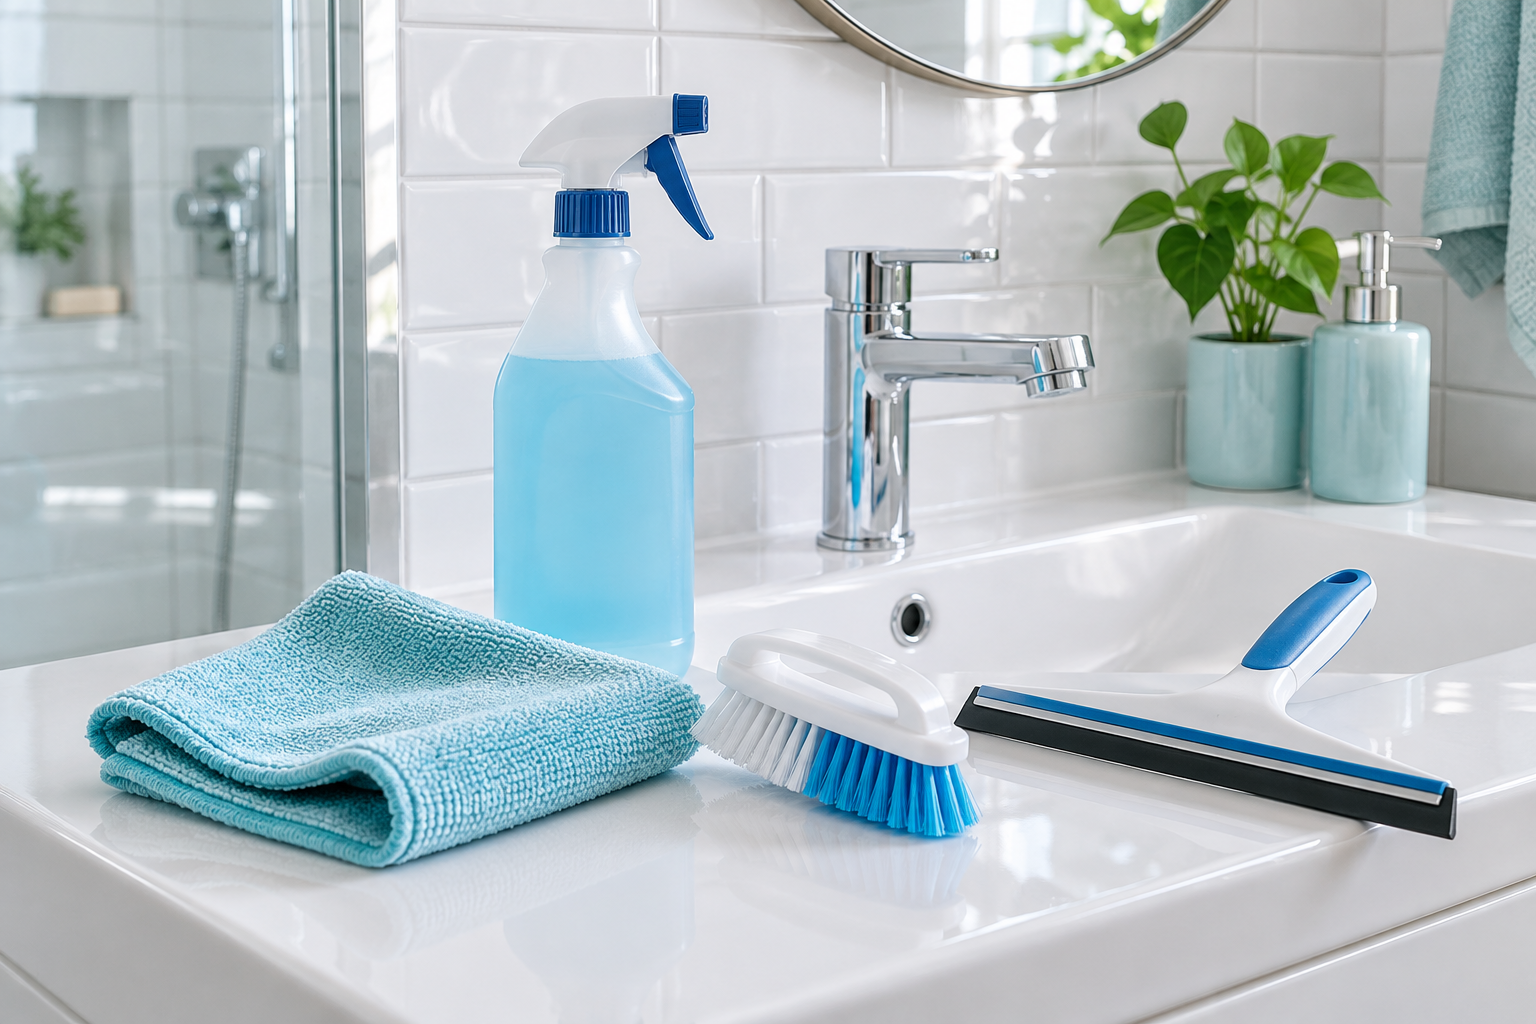
- a spray bottle only if you are using a compatible ready-to-use or correctly diluted product;
- gloves and good ventilation when required by the product label;
- old towels to protect the floor, track and nearby finishes.
Keep a separate dry glass cloth for the final polish. A cloth already holding bathroom grime or fabric-softener residue can leave streaks.
Avoid steel wool, razor blades, melamine foam, abrasive powders and rough green scourers unless the glass manufacturer explicitly approves a particular tool. Even products described as gentle can alter a protective coating or leave fine scratches.
Prepare the Shower Before You Start
Open the bathroom window or run the exhaust fan. Remove bottles, toys, razors and bath mats so you can work without knocking items into the wet area.
Rinse loose hair and grit away from the glass, seals and track. This small step matters because trapped grit can scratch when rubbed across the surface. Lay an old towel outside the shower and protect any stone or delicate metal that should not contact the chosen cleaner.
Use comfortably warm water rather than boiling water. Wetting the glass helps soften surface residue, but sudden temperature changes are not worth the risk. Work when the glass is cool and out of strong direct sun so the cleaner does not dry before you can rinse it.
If the buildup is heavy, divide the door into manageable sections. Keeping one section wet and controlled is more effective than covering the whole enclosure and rushing.

Use the Gentlest Method First
Mix warm water with a small squeeze of dishwashing liquid. You want light suds, not a bucket full of foam. Apply it with a damp microfiber cloth or glass-safe sponge.
Spread the solution over one section and let it sit for a few minutes without drying. This contact time helps soften the oily soap film. Gently wipe in overlapping passes, applying only light pressure. Re-wet stubborn areas instead of scrubbing harder.
Rinse the cloth frequently so you are lifting residue rather than moving it around. When the haze releases, rinse the glass thoroughly with clean water. Pull the squeegee from top to bottom, wiping the blade between passes, then dry the edges with a fresh cloth.
This simple method is often enough for light or recent buildup and is a sensible first choice for coated glass when the manual permits mild detergent.

Treat Stubborn Soap Scum Without Scrubbing Harder
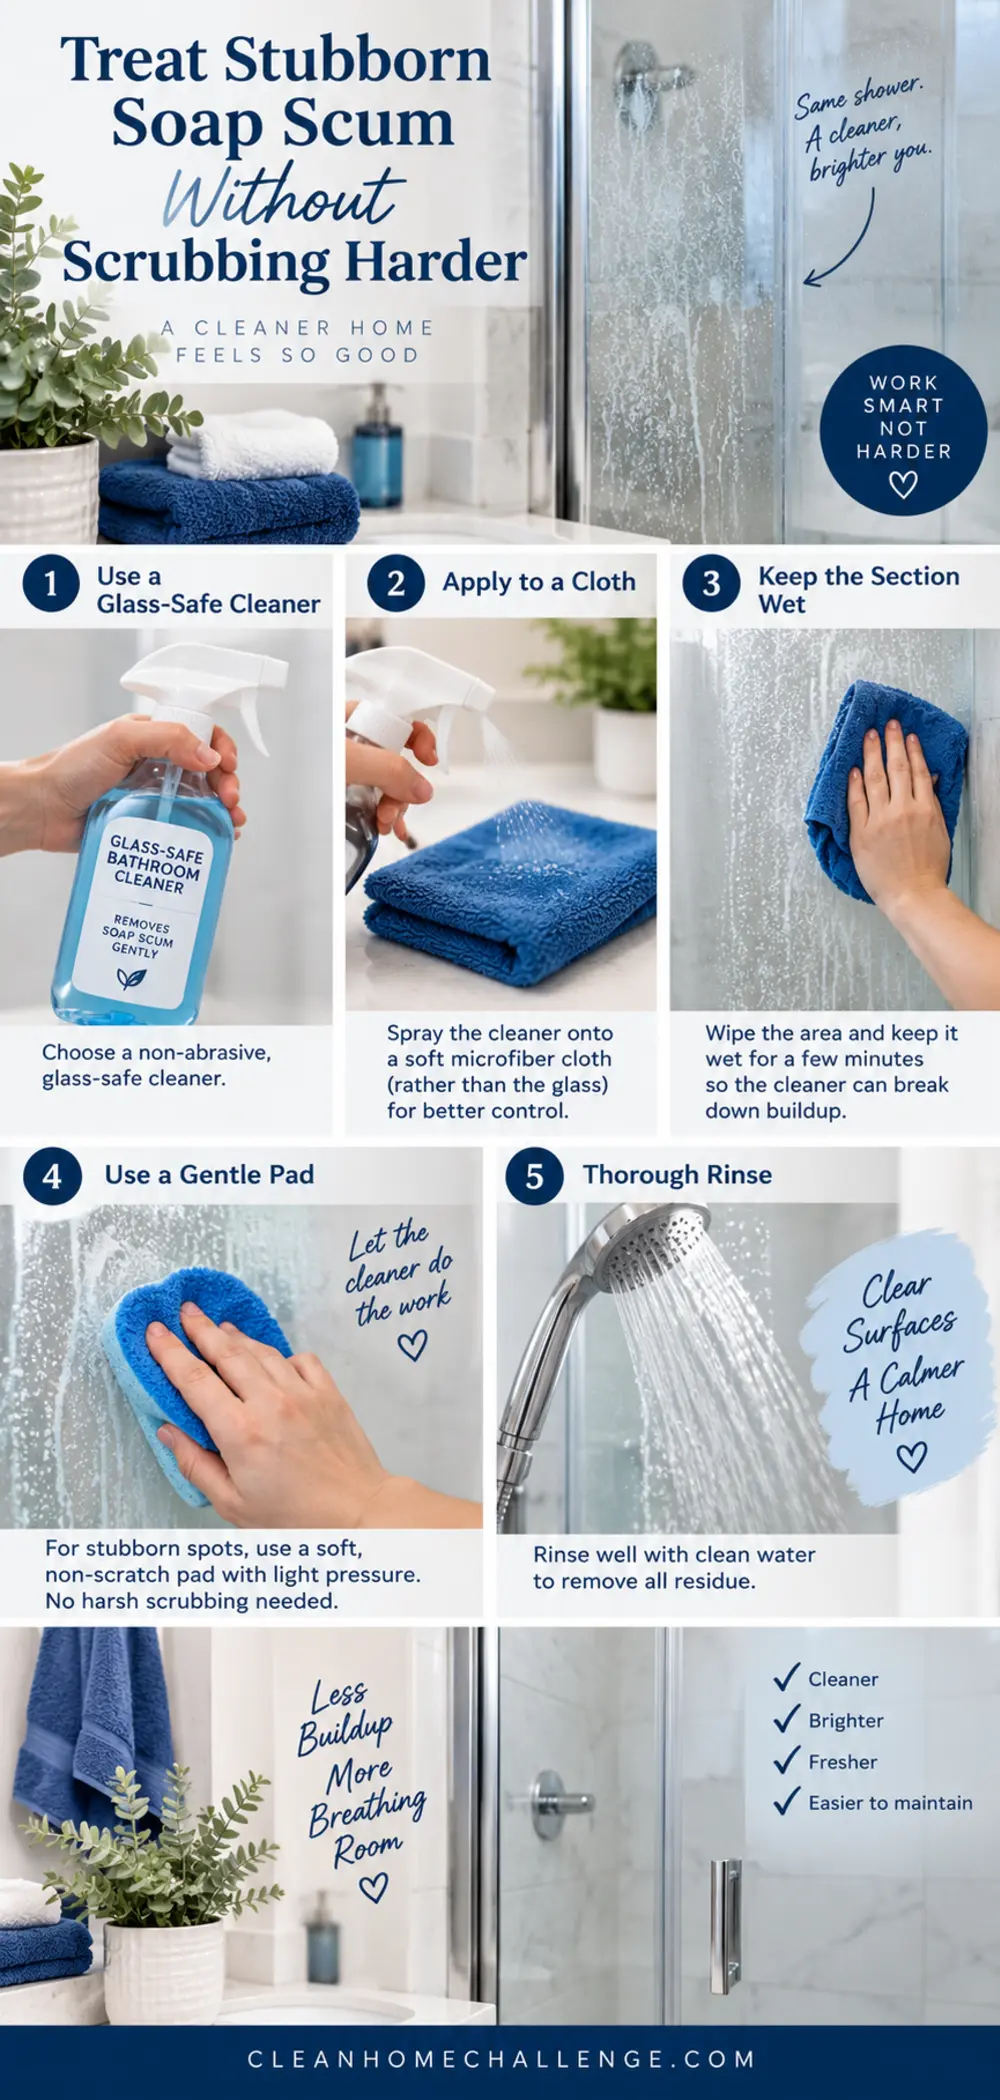
For thicker buildup, use a shower-glass cleaner that states it is suitable for your glass and coating. Read the label for application, contact time, ventilation, rinsing and personal-protection instructions.
Apply the product to the cloth or pad when overspray could reach stone, metal, paint or other sensitive surfaces. Work from the bottom upward when the label allows; this can reduce run marks. Keep the section evenly wet for the stated time, but never allow the product to dry.
Agitate gently with a non-scratch pad, then rinse very thoroughly. Repeat one controlled treatment if needed. Two gentle rounds are safer than one aggressive scrub.
If you choose diluted white vinegar for uncoated glass, first confirm the manufacturer permits it and protect acid-sensitive stone and metal. Never combine vinegar with bleach or another cleaner. Vinegar helps with mineral residue but is not automatically the best answer for every enclosure, and it should not replace the product or surface instructions.
Clean the Edges, Track, Hinges and Seals Carefully
Residue collects around the door edges, lower sweep, frame and track. Use a damp microfiber cloth wrapped around your finger or a soft detail brush to loosen grime without scratching the glass or finish.
Do not flood the track or force liquid into hinge mechanisms. Remove loose hair first, then wipe with mild soapy water and follow with a clean damp cloth. Dry metal hardware promptly to reduce spotting.
Rubber and vinyl seals can be delicate. Support the seal as you wipe it and avoid pulling it away from the glass. If a sweep is split, permanently discolored or no longer sealing, replacement may be more useful than repeated heavy cleaning.
Black growth embedded beneath silicone or behind a seal may not be reachable from the surface. Persistent growth, failed caulk, leaks or damaged seals need repair rather than stronger scrubbing.

Rinse, Squeegee and Dry for a Clear Finish
Cleaner residue can create a new haze, so rinsing is part of the cleaning job. Rinse from the top down with clean water until the glass no longer feels slippery.
Use the squeegee in straight, slightly overlapping passes. Wipe the rubber blade after each pass so residue does not return to the glass. Catch water along the bottom edge with a towel instead of letting it sit in the track.
Dry the corners, hinges and seals with a clean microfiber cloth. Finish with the dedicated dry glass cloth, polishing lightly rather than pressing hard.
View the glass from an angle once it is dry. If only a few spots remain, spot-treat them rather than repeating the entire job. Cloudiness that appears only after drying usually signals remaining cleaner or minerals, so another clean-water rinse may solve it.

Avoid These Shower-Glass Cleaning Mistakes
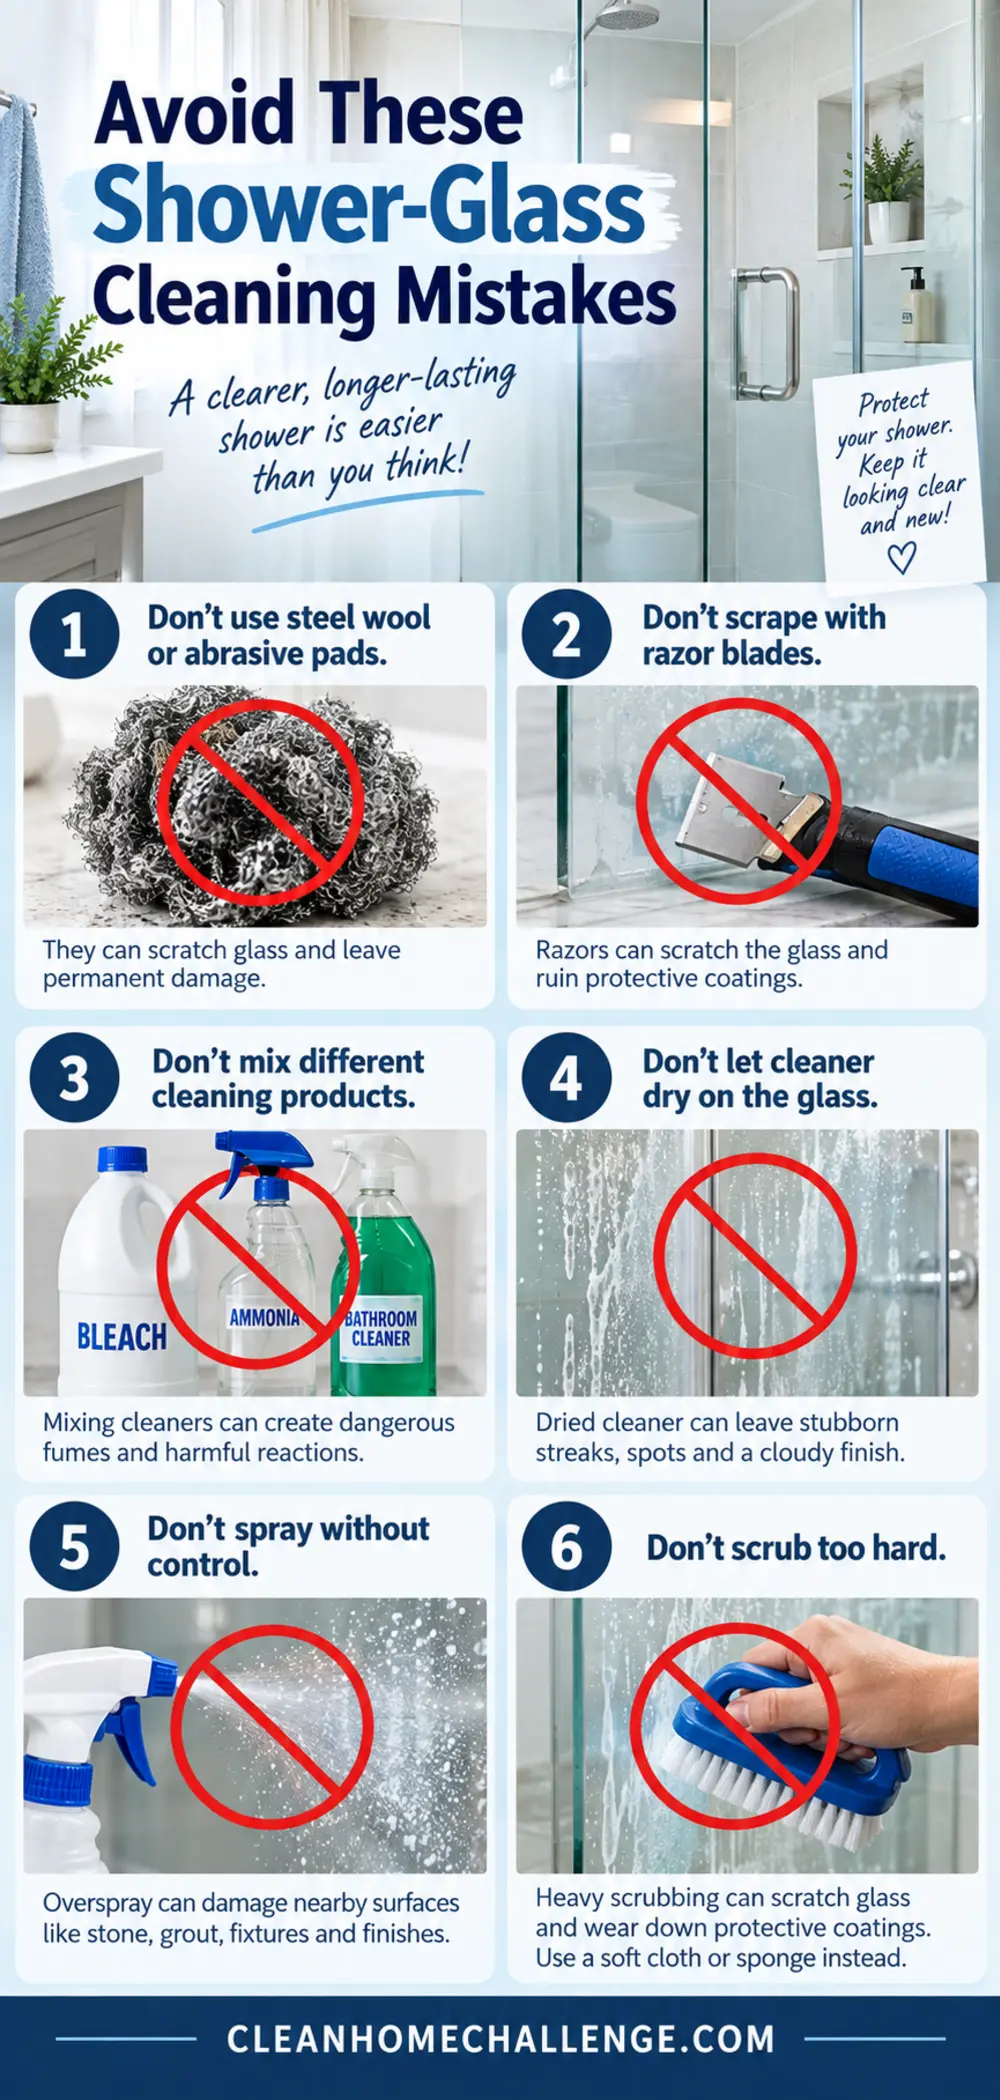
- Using abrasive tools: Steel wool, rough scourers and abrasive powders can scratch glass, frames or protective coatings.
- Scraping without approval: A blade can damage coated glass, catch an edge or create a serious injury risk. Follow the door maker’s guidance rather than improvising.
- Mixing products: Never mix bleach with vinegar, acids, ammonia, alcohol or other cleaners. Use one product, rinse it away and follow its label.
- Letting cleaner dry: Dried product can leave streaks, residue or damage on sensitive finishes.
- Spraying every surface: Overspray can affect stone, metal, painted walls and flooring. Control the product with a cloth when needed.
- Using more pressure instead of more time: Re-wet the buildup and allow the approved contact time rather than scrubbing aggressively.
- Ignoring loose grit: Hair, sand and mineral particles can be dragged across the glass.
- Expecting cleaning to repair etching: Permanent surface damage needs professional assessment, restoration or replacement.
Keep Shower Glass Clear With a Two-Minute Routine
The easiest way to manage soap scum is to remove water and product residue before it dries. After the final shower of the day, run a squeegee over the main glass panels from top to bottom. Wipe the bottom edge and hardware with a small microfiber cloth.
Leave the door or screen positioned according to the manufacturer’s ventilation advice, and run the exhaust fan long enough to clear lingering moisture. Hang cloths where they can dry completely.
Add the shower glass to your Tuesday bathroom routine:
- Remove bottles and rinse loose residue.
- Wipe fresh marks with mild soapy water.
- Rinse and squeegee the glass.
- Dry the track and hardware.
- Check seals and caulk for damage.
This short weekly reset prevents the kind of thick buildup that turns into an exhausting deep-cleaning job.

CLEANERS CLUBHOUSE
Take the Guesswork Out of Bathroom Cleaning
Use Tuesday as your bathroom reset day and work through the job in a sensible order. Inside the Cleaners Clubhouse, you’ll find practical routines, printable support and challenges that make deeper cleaning easier to manage.
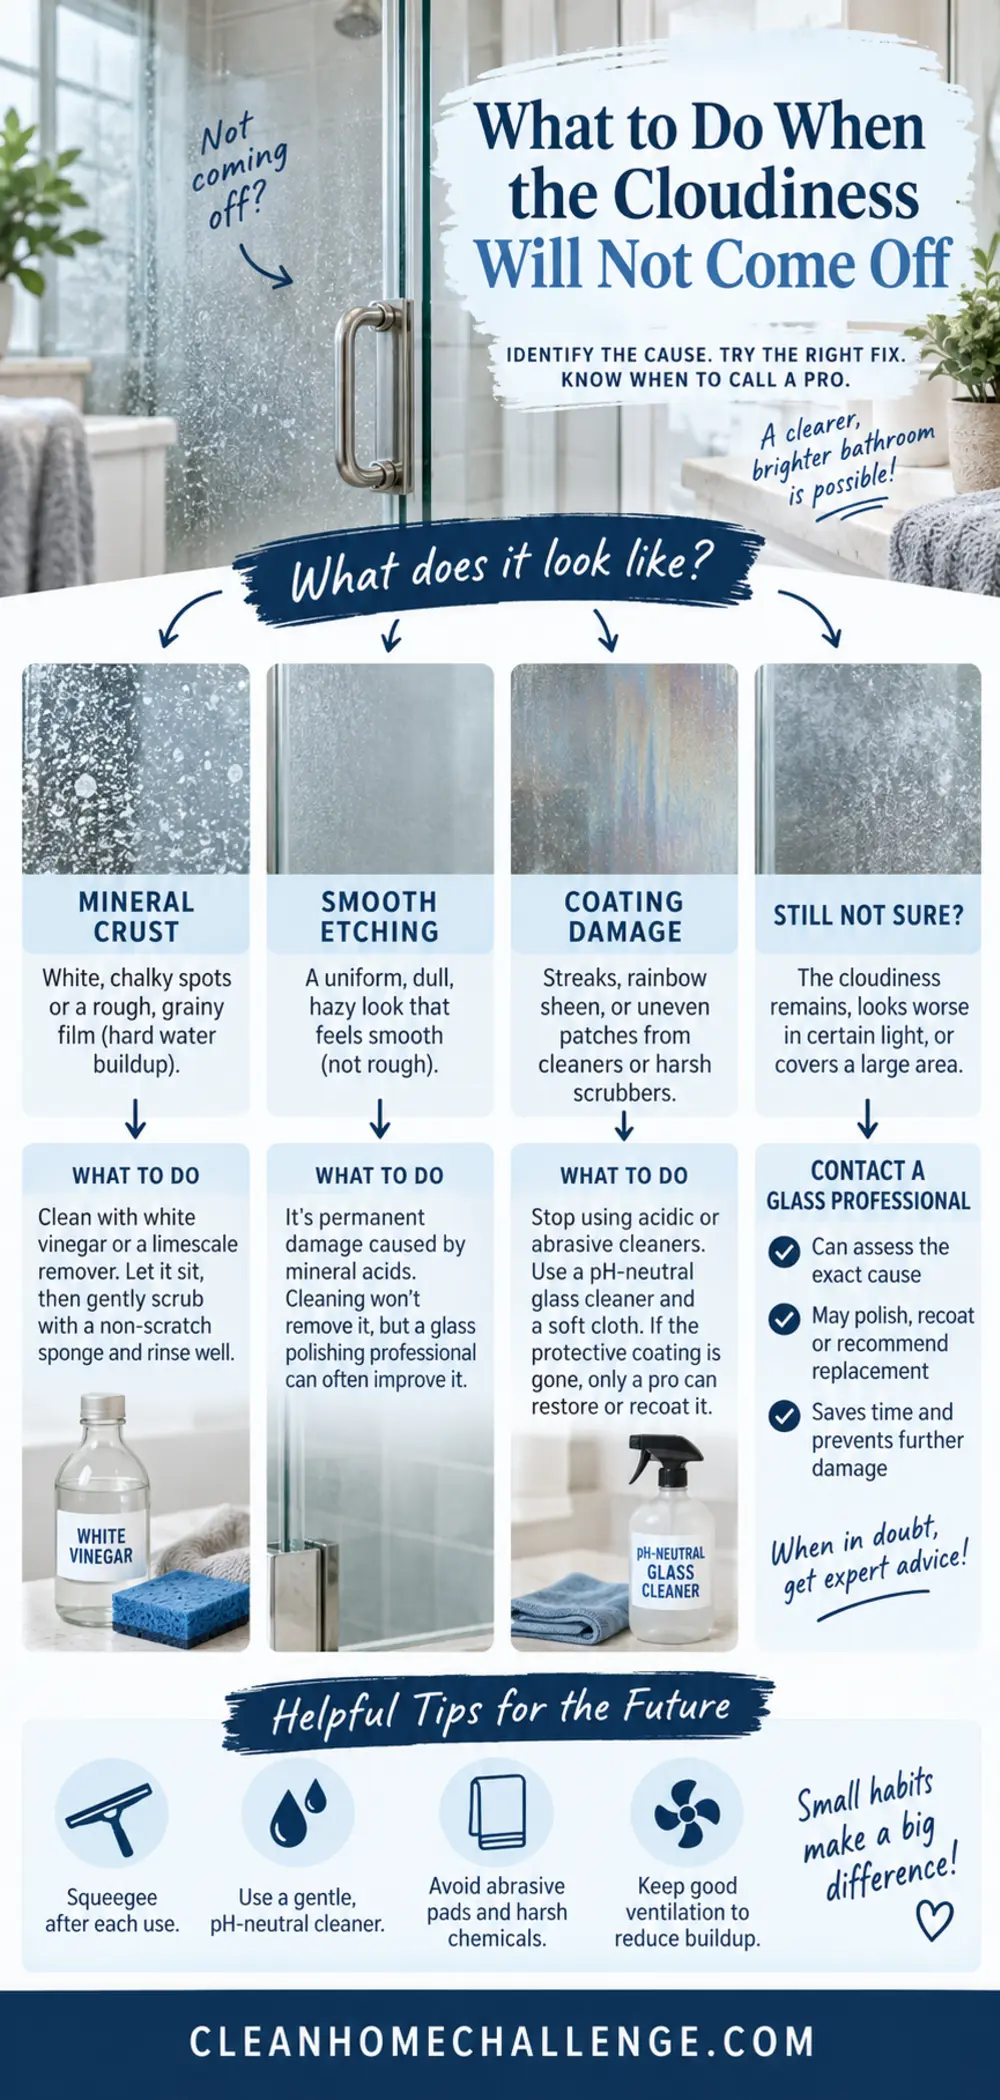
What to Do When the Cloudiness Will Not Come Off
If careful cleaning does not change the marks, stop before moving to harsher tools. Recheck the glass maker’s instructions and consider what the residue may be.
A rough, crusty deposit may need a compatible mineral remover and repeated controlled treatments. A smooth dull patch may be etched. Damage within a coating may look uneven or rainbow-like. Moisture trapped between laminated layers or insulated panels is not a surface-cleaning issue.
For valuable custom glass, protective coatings, severe scale or uncertain damage, contact the shower-door manufacturer or a professional glass-restoration service. Explain what products have already been used. This helps them avoid incompatible follow-up treatments.
Also investigate why the buildup is returning so quickly. A dripping showerhead, poor ventilation, failed seals or consistently hard water can keep recreating the problem. Fixing the cause often saves more time than stronger weekly cleaning.
Your Simple Shower-Glass Maintenance Plan
For most households, a manageable plan looks like this:
| When | What to do |
|---|---|
| After the last shower | Squeegee the main glass and wipe the bottom edge. |
| Tuesday bathroom routine | Wash light residue with a compatible mild cleaner, rinse and dry. |
| Monthly | Inspect tracks, seals, hinges and corners; treat early buildup. |
| As needed | Deep-clean one section at a time using a manufacturer-approved product. |
If daily squeegeeing is unrealistic, aim for several times a week or keep one in the shower for whoever remembers. Consistency matters more than perfection.
The best method is the one that protects the glass and fits into ordinary family life: gentle product, enough contact time, a non-scratch tool, a thorough rinse and a quick dry. Once the existing film is gone, that tiny squeegee habit makes the biggest difference.

Frequently Asked Questions About Cleaning Shower Glass
Can I use vinegar on shower glass?
Only if the glass manufacturer permits it and nearby surfaces are acid-safe. Vinegar can help loosen mineral residue on uncoated glass, but it can damage natural stone and some finishes. Never mix it with bleach or another cleaner.
Can I use a magic eraser on glass shower doors?
Melamine foam is mildly abrasive. It may affect a protective coating or surrounding finishes, so do not assume it is safe. Check the shower-door instructions and use a soft microfiber cloth or glass-safe non-scratch pad as the cautious default.
Why does my shower glass still look cloudy after cleaning?
It may still hold detergent residue or mineral scale, so rinse and dry it again first. If a smooth cloudy area never changes, the surface may be etched or the coating may be damaged.
How often should I clean shower glass?
Squeegee after use when practical, give it a quick clean during the weekly bathroom routine, and deep-clean only when buildup needs it. Homes with hard water or frequent showers may need more frequent attention.
Do I need to disinfect shower glass?
Usually not for ordinary soap scum. Cleaning removes the visible residue. Disinfection is a separate step used for specific hygiene needs and should be done only with a surface-compatible product used exactly as labeled.