

THIS POST MAY CONTAIN AFFILIATE LINKS. PLEASE READ MY DISCLOSURE FOR MORE INFO.
Moving boxes have a way of multiplying just when the cleaning needs to begin. An end of lease cleaning checklist gives you a clear order, so you can work through the rental without repeatedly cleaning around belongings or wondering what you missed.
Start with your lease, move-in condition report, and written handover instructions. Cleaning expectations, professional-service requirements, and the treatment of wear and tear depend on your agreement and local rules. This is practical cleaning guidance, and no checklist can guarantee a deposit or bond refund.
The useful sequence is simple: empty each space, remove loose dust, clean compatible surfaces, finish the floors, and document the result. Here is how to make that manageable.
Disclosure: This post may contain affiliate links. As an Amazon Associate, Clean Home Challenge earns from qualifying purchases. If you make a purchase through these links, we may earn a small commission at no extra cost to you. This helps us keep creating practical cleaning tips, routines and resources for busy families! 🧽
Plan Your Move-Out Clean
Compare the starting condition before scrubbing
Gather your move-in report, original photographs, maintenance messages, furniture inventory, and any move-out checklist supplied by the property manager. Walk through the home with them before buying more products.
Note existing chips, scratches, worn carpet, discolored sealant, and marks already recorded. Take current photos of anything uncertain. Dirt may clean away; a damaged finish will not become new through harder scrubbing. If the condition or responsibility is unclear, ask for written clarification before attempting repairs or an aggressive treatment.
Condition records are useful because they make the comparison specific. For example, the Queensland Residential Tenancies Authority explains how an entry report and supporting photos record a rental’s original condition. Use the equivalent guidance for your own location.
Put the clean in the right order
- Confirm the key-return date, inspection arrangements, and when movers will finish.
- Keep water and electricity available for the cleaning and drying you need to complete.
- Arrange any agreed specialist work early, including access and drying time.
- Pack personal belongings first, leaving one clearly marked cleaning kit until last.
- Start slow jobs, such as an approved oven-cleaning process, early enough to finish safely.
- Clean high accessible areas before lower surfaces, then work toward the exit.
- Reserve a separate final check after the home is empty.
Avoid dragging appliances out to reach hidden dirt. Built-in units, gas connections, water lines, anti-tip restraints, and heavy appliances need appropriate handling. Ask the property manager about inaccessible areas rather than risking an injury or damaged floor.
Allow more than the final evening
There is no reliable one-size-fits-all cleaning time. A furnished home, several bathrooms, greasy appliances, or limited mobility can change the plan substantially.
As a planning example, split a small, mostly emptied rental across two days. On day one, handle cupboards, reachable dusting, appliances, and bathroom detail work. On day two, finish rooms after the movers, vacuum, clean suitable hard floors, allow drying, and take photos. Larger or heavily soiled homes may need additional days or help.
Use 25- to 40-minute work blocks with breaks if that suits you. Those are pacing suggestions, not deadlines for completing a room. Product contact times, appliance cycles, and drying still take the time their instructions require.
Low-energy starting point: collect the paperwork, empty one cupboard, or assign one complete room to a helper. Specific jobs are easier to share than “help me clean.” Keep a short list of unfinished tasks so you can stop without losing your place. If belongings are still slowing you down, our guide to decluttering before moving house can help you make space before the detailed clean.

Pack a Surface-Safe Cleaning Kit
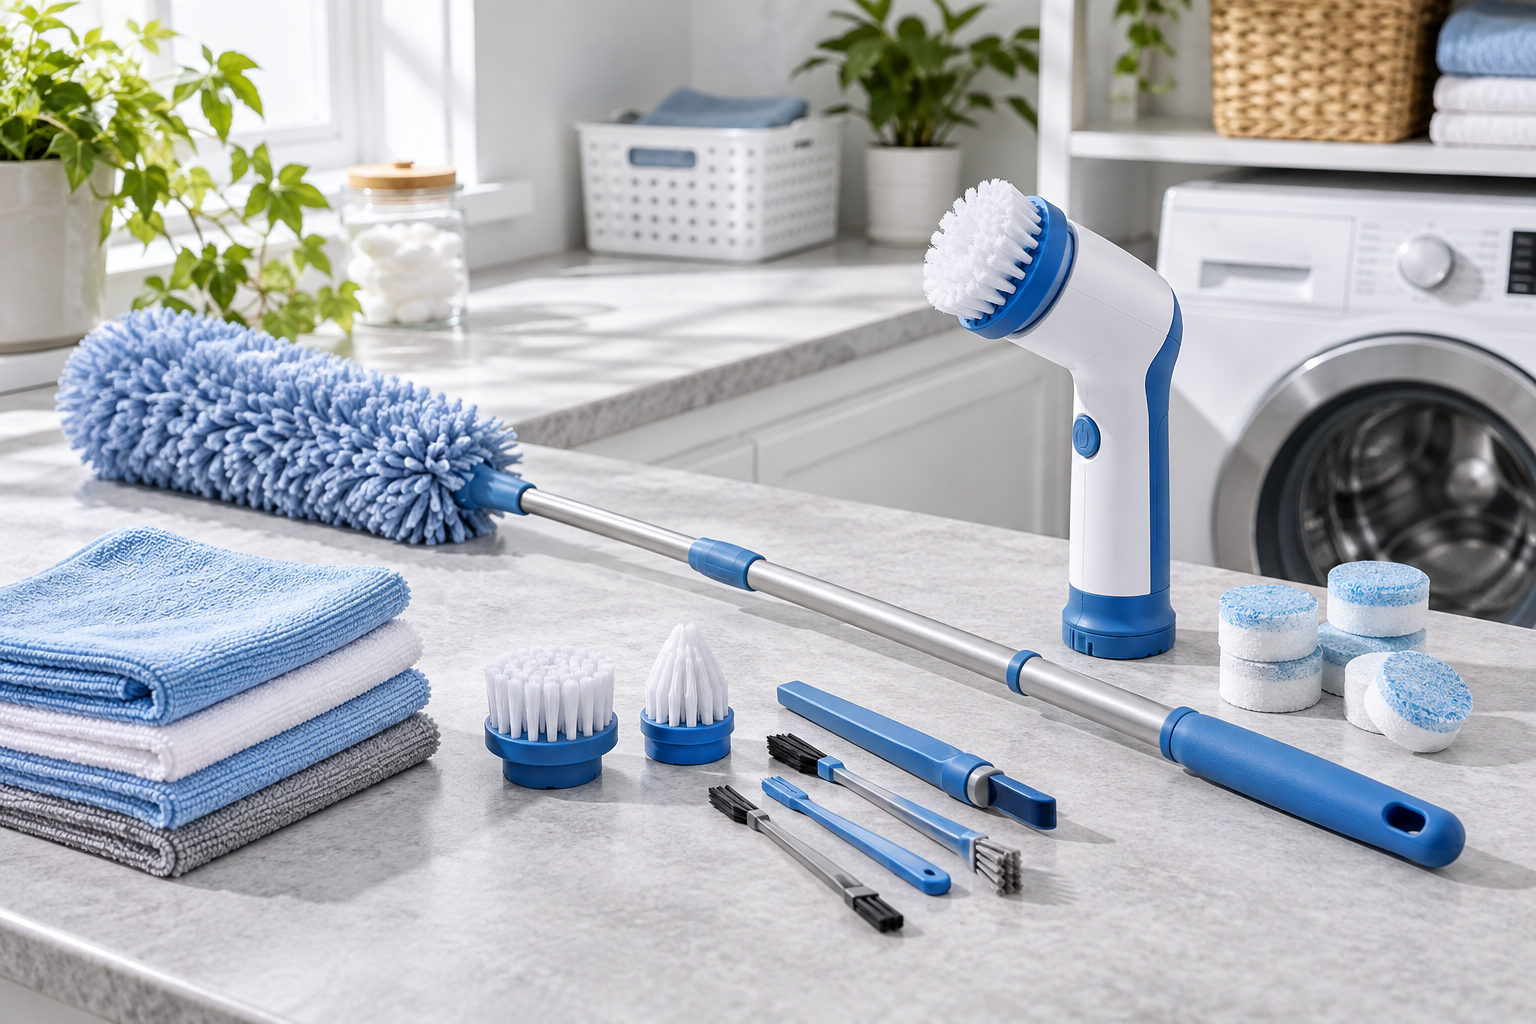
A useful kit matches the rental’s surfaces. Check what you already own before adding specialist products.
- Clean microfiber cloths, plus a separate set for toilets
- Non-scratch sponges and a small soft brush
- Vacuum with appropriate floor and crevice attachments
- Duster with an extension handle for safely reachable areas
- Mop and clean pads suited to the flooring
- Mild detergent and any surface-specific cleaners the manufacturers allow
- Gloves and other protection required by product labels
- Trash bags, a dustpan, and a container for small forgotten belongings
- Phone, charger, checklist, and a pen
Keep products in their labeled containers, secure them away from children and pets, and ventilate as directed. Never mix cleaning products. In particular, do not combine bleach with vinegar, acidic toilet cleaner, ammonia, or another cleaner. The CDC’s bleach guidance warns against mixing bleach or disinfectants with other products.
Cleaning removes dirt and residue. Disinfecting is a separate step when circumstances call for it; moving out does not automatically mean every surface needs disinfectant. When using one, clean first as directed, respect the full wet contact time, and follow any rinsing requirement. See the CDC’s home cleaning guidance.
Identify the material and finish before treating it. Follow its care instructions, then test an allowed method in an inconspicuous spot. Protect neighboring materials from drips. Natural stone, painted walls, coated stainless steel, wood, and laminate do not share one universal cleaning recipe.
Keep used cloths separate from clean ones and change dirty water. A fresh cloth often helps more than another squirt of product.

Clean the Kitchen and Appliances
The kitchen has plenty of small surfaces, so finish one zone before moving to the next. Work on cool appliances with controls off, following the model’s instructions for disconnecting power where needed. Keep liquid away from controls, sockets, and electrical openings.
Empty cupboards, drawers, and counters
- Remove food, shelf liners you added, and loose belongings, unless their removal could damage the surface.
- Vacuum or brush away crumbs inside cupboards and drawers.
- Wipe shelves, drawer interiors, door fronts, handles, and accessible cabinet tops using a compatible cleaner.
- Use a lightly damp cloth around laminate edges and cabinet seams; dry promptly.
- Clean backsplash areas and counters, including corners previously hidden by small appliances.
- Clean and dry the sink, faucet base, strainer, and the cupboard beneath it.
If a liner or adhesive resists removal, stop and check the finish and product instructions. An improvised solvent or blade can leave more obvious damage than the original residue.
Use a stone-approved cleaner on natural stone. The Natural Stone Institute advises against acidic cleaners such as vinegar or lemon on acid-sensitive stone. A bathroom descaler should not drift onto a stone kitchen counter either.
Give the oven its own plan
Find the model number and manual before choosing an oven cleaner or cycle. Self-cleaning, steam-cleaning, catalytic, and conventional interiors can have different restrictions. For example, Whirlpool warns against commercial oven cleaners in its self-cleaning ovens.
- Begin with a cool oven and remove loose cookware.
- Remove racks only as the manual directs, and clean them using a compatible method.
- Treat the cavity using the approved process, allowing its stated working and cooling time.
- Clean accessible door glass and the exterior with approved nonabrasive tools.
- Remove residue as instructed, dry removable parts, and reassemble correctly.
Do not scrub door gaskets, flood vents, dismantle the door, or assume a razor scraper is suitable for the glass. A self-clean cycle requires the manual’s preparation, ventilation, pet precautions, and cooling period; it is not a last-minute shortcut before handing back keys. If the appliance is damaged or unfamiliar, seek guidance first.
Check the cooktop and range hood
Clean a cool cooktop using instructions for its exact surface. Lift only removable components that the manual identifies, keep burner openings dry, and put parts back correctly.
For a washable metal grease filter, follow the hood manual for removal and cleaning. Warm water and dishwashing liquid can be appropriate; rinse and dry the filter thoroughly before replacing it. Bosch’s hood guidance distinguishes washable grease filters from charcoal filters. Do not soak a charcoal filter or put any filter in the dishwasher unless its instructions permit that method.
Finish the refrigerator, freezer, and dishwasher
Empty the refrigerator and freezer, arranging suitable cold storage for any food you are keeping. Follow the manual for powering down, defrosting, and cleaning. Never chip ice with a knife or another sharp tool.
Wash removable parts using their approved method, wipe accessible interiors and gaskets, and dry everything. Let cold glass shelves warm before washing; GE Appliances warns that hot water on cold refrigerator glass can cause breakage. Confirm the requested power and door position for handover, keeping children away from empty appliances.
For the dishwasher, remove loose debris, wipe door edges, and clean the user-removable filter according to its manual. Refit it securely before running any approved cleaning cycle. Finish by checking the detergent compartment, door handle, and surrounding cabinet edges.

Reset Bathrooms and the Laundry Area
Start with mirrors, shelves, and the vanity, then tackle the shower or tub and toilet. Use separate toilet tools so they never return to kitchen or vanity cleaning.
Bathroom checklist
- Empty drawers, cabinets, shower shelves, and wastebaskets.
- Remove loose hair and dust before applying cleaner.
- Clean the mirror with a product suitable for the glass and surrounding frame.
- Wipe the vanity, faucet, faucet base, drawer fronts, and handles.
- Clean shower walls, the tub, accessible door tracks, and screens with compatible products.
- Clean the toilet bowl, seat, accessible hinges, exterior, and base.
- Wipe towel rails, the door, reachable trim, and the outside of the exhaust grille.
- Remove trash and leave surfaces dry where their care instructions allow.
Use the bathroom cleaner’s labeled working time rather than scrubbing immediately or letting it dry for longer than directed. For mineral deposits, check the faucet coating, shower glass treatment, grout, and nearby stone before choosing a descaler. Stronger acid is not a safe default.
Do not layer products in the toilet. If another product or an in-tank treatment is already present, check compatibility and the label before adding anything. Keep cleaner away from items you are still using, and clean the toilet’s exterior with its dedicated cloth.
Know when to stop
Discolored grout or sealant may need attention beyond routine cleaning. Report persistent mold, leaks, damaged caulk, sewage contamination, or suspected hidden moisture rather than covering the area or escalating through stronger chemicals.
The EPA’s mold guidance emphasizes correcting moisture problems and assessing when professional help is needed. Extensive growth, water damage, and contamination inside building materials are outside this checklist. Photograph and communicate the concern promptly.
Laundry-area checklist
Clean the utility sink, countertop, accessible shelves, cabinet interiors, and the outside of any appliances that stay with the rental.
If a washing machine remains, check its manual for cleaning the dispenser, accessible gasket, and drum. Run only the specified maintenance cycle with an approved product; do not add a homemade mixture. Whirlpool’s washer-care guide explains why the dispenser, interior, and exterior need their own steps.
Remove lint from a dryer’s accessible lint screen according to its instructions. Leave duct disconnection and inaccessible vent work to an appropriate service provider. If you are taking appliances with you, arrange proper disconnection before cleaning the newly exposed floor. Report leaks instead of tightening unfamiliar fittings yourself.
Smaller session: finish the vanity and one drawer today, then the shower and toilet in separate work blocks. Leave bathroom floors until the remaining wet work is finished.

Work Through Bedrooms and Living Areas
An emptied room reveals dust that furniture used to hide. Choose one direction around the room and make a full circuit before moving on.
Repeat this room checklist
- Remove belongings from closets, shelves, drawers, and behind doors.
- Dust safely reachable upper trim, curtain rods, and light-fitting exteriors.
- Dust accessible fan blades only while the fan is off and stationary.
- Clean closet shelves, hanging rails, accessible tracks, and handles.
- Dust blinds gently and follow care labels for any curtains that belong to the rental.
- Clean doors, handles, baseboards, and other suitable trim.
- Wipe switch-plate surfaces with minimal moisture, keeping liquid out of openings.
- Check interior windows, sills, and accessible tracks.
- Leave the floor for the final pass.
Use an extension tool from a stable position where practical. Do not stand on furniture, overreach through windows, or remove electrical fixtures to reach dust. Ask about areas that need specialist access.
Be gentle with wall marks
First identify the paint finish and check the move-in record. Where the finish allows cleaning, dust gently, try a soft cloth barely dampened with water, and inspect the result after drying. Move to a compatible mild cleaner only if needed and approved.
Flat and matte paint need particular care. Benjamin Moore’s wall-cleaning advice recommends matching the method to the sheen and using a gentle touch. Stop if color transfers, the sheen changes, or the paint softens. Avoid treating an abrasive eraser as a universal solution.
Do not patch, repaint, or strip adhesive fittings simply to make the checklist look complete. Clarify the required and permitted approach first.
For a furnished rental, check the inventory and clean upholstery only according to its care instructions. Return included furniture and accessories to their agreed locations without dragging them across the floor. Open every storage space once more before calling the room finished.

Finish Floors, Outdoor Areas, and Missed Spots
Clean floors after the other work
Vacuum or sweep dry debris first, including edges, corners, closets, and the space behind doors. Select the vacuum setting and attachment appropriate for the floor.
For a compatible hard floor, use its approved cleaner and the recommended amount of moisture. With a flat mop, work in small sections, drawing the pad back toward you in controlled passes. Change dirty pads and move toward the doorway so you can leave the floor to dry undisturbed.
Never assume a steam mop is suitable because a floor looks sealed. The National Wood Flooring Association advises against wet and steam mops on wood floors. Laminate, vinyl, stone, and coated floors also need their own manufacturer’s guidance. Avoid soaking seams or leaving puddles.
Vacuum carpet slowly, including perimeter edges. For a spot, identify the carpet fiber and stain, then use the manufacturer’s approved treatment after a hidden-area test. Avoid overwetting or repeatedly rubbing an unknown stain. If professional carpet cleaning is required or agreed, confirm the scope and allow the provider’s full drying time before final access.
Check outside areas that belong to the rental
- Remove your belongings and trash from balconies, patios, porches, and storage areas.
- Sweep accessible hard surfaces without pushing debris or dirty water onto neighbors.
- Clean accessible outdoor furniture included in the inventory.
- Complete garden or lawn tasks that fall within your agreement.
- Empty and clean bins when appropriate, following local waste rules.
- Check the garage, storage cage, mailbox, and other assigned spaces for forgotten items.
Avoid pressure washing, climbing, roof work, or treating exterior materials without permission and suitable guidance. Secure children and pets away from open balcony doors and cleaning areas.
Give overlooked details one last pass
Look at door tops, reachable vents, cabinet corners, window tracks, sliding-door tracks, baseboard edges, and the area behind the toilet. Vacuum dry debris from accessible tracks before wiping gently. Do not force mechanisms or dismantle windows.
Leave air-conditioning filters and removable vent covers to the model’s user-care instructions. Do not open electrical housings. A checklist is useful for noticing a problem; it does not make every maintenance task safe to attempt yourself.

Check Every Room Before Returning the Keys
Save enough time for an unhurried walkthrough in good light. Open doors and cupboards, inspect from different angles, and look at the surfaces that were hidden until moving day.
Final handover checklist
- Every room, closet, drawer, and assigned storage area is empty of your belongings.
- Kitchen and bathroom surfaces are clean, with residue removed as directed.
- Appliance parts are correctly refitted and any cleaning cycles are finished.
- Floors and cleaned removable parts have had time to dry.
- Trash, food, used cloths, and cleaning products have been removed.
- Included furnishings match the inventory and agreed placement.
- Existing wear, unresolved faults, and completed work are documented accurately.
- Windows, doors, appliances, and utilities are left as agreed for handover.
- Keys, remotes, access cards, and any requested paperwork are ready.
Take a wide photo of each room, then closer photos of appliance interiors, cupboards, fixtures, and any relevant remaining marks. Keep the original files with the condition reports, service receipts, and written communications. Photographs support a clear record; they do not replace a required inspection or local process.
If you hire cleaners, compare their written inclusions with your own list before the appointment. Ask whether ovens, windows, carpets, outdoor spaces, and any return visit are included. Keep the receipt, but still inspect the finished work yourself. Whether professional cleaning is required depends on your agreement and local rules, so check the relevant tenancy authority if anything is unclear.
If energy or time runs short, write down what remains and arrange help or clarification before the handover deadline. Avoid hiding a problem or trying an unfamiliar harsh treatment in the final ten minutes.
Once a room is finished, keep foot traffic and stored boxes out where practical. Keep one small kit available for the final fingerprints and the last trash bag, then pack it. A calm sequence, surface-appropriate methods, and a clear record make the move-out clean easier to finish with confidence.
For the next home, keep our move-in cleaning checklist handy so you can tackle useful jobs before you unpack.

CLEANERS CLUBHOUSE
Need Help Getting Through a Proper Deep Clean?
Follow the 7-Day Deep Clean Bootcamp when your home needs more than a quick tidy. The Cleaners Clubhouse breaks the work into achievable steps with printable support and seasonal cleaning guidance.
